Followers

Showing posts with label frantage embossing enamel. Show all posts

Wednesday, 18 November 2020

Die Cut Flowers for Gill

 Evening Everyone,

Well our nice bright day, has turned into torrential rain, so I'm going to hide indoors I think. 

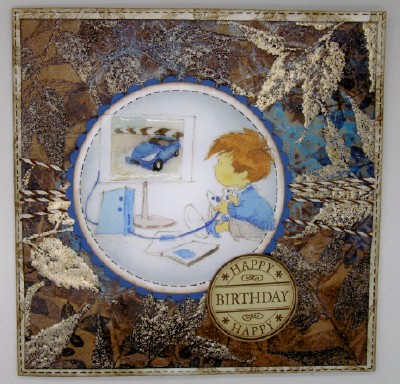
Since today is Wednesday it is time for my lovely friend Gill to set her weekly challenge at Christmas Cards and Papercraft Challenge over on Facebook. This week she is looking for Die Cut Flowers.

I delved into my box of cards and came up with a couple that I made in a class at the beginning of the year. I do miss my Saturdays teaching my group of lovely crafty friends.
The background to the card was created by running a stencil through my embossing machine and then sponging it with plenty of ink.
They really are the most fabulously useful things and so very affordable. 
You can use the debossed side as in the first card,
or you can use the embossed side as with this one. I then added the required die cut flowers and foliage, along with a stamped and embossed sentiment.
Same design just a different colour combo. 
I used Distress Oxides for all of them and then added some gilding wax to the finished panel to highlight the dry embossing.
I added some gems or glitter glue to the flower centers. I'm sure that Gill will appreciate the added bling.
This final card uses some die cut and heat embossed snowflakes. 
I die cut the snowflakes and then covered them in versamark ink before adding Frantage Embossing powder.
I hope that these will inspire you to dig our your floral dies and stencils.
Thanks for stopping by.
Hugs Kimx

Tuesday, 20 October 2020

Imagination Florals

 Evening,

I hope that you have all made it through another Tuesday safe and sound.

Another card using my favourite Imagination stencil.
I used Sparkle Medium through the stencil to create the background and then sponged over it with Distress Inks.
I trimmed the panel and wrapped a couple of pieces of ribbon around it before adding a sentiment and some foliage.
Here is another very similar card using another Imagination Stencil, only this time I sponged the Distress ink through the stencil and left it at that.
Once again I added ribbon, a sentiment and some foliage covered in Frantage Embossing Powder.
I also added some dots of glossy accents to finish it off.
Thanks for stopping by.
Hugs Kimx

Wednesday, 26 February 2020

Frantage Embossing Powders

Evening Everyone,
What beautiful sunshine we had this morning. It was glorious, if still very cold. Isn't it amazing how much better you feel for seeing those lovely sunny rays.
I have another couple of cards using embossing for you this evening.
This first one just uses Frantage Embossing Powders sprinkled onto kraft card and then heated from below to stop the embossing powder from blowing away.
This card also uses Frantage Embossing Powder, but this time I stamped the images onto kraft card before sprinkling them with the powder and tapping off the excess.
The greeting was taken from a Woodware set designed by Francoise Read.
I thought that I might enter another challenge. I know two days in a row, what's going on right, lol.
Creatalicious challenges have an Anything Goes with an optional Embossing challenge that finishes in a day or so.
Thank you so much for stopping by.
Hugs Kimx

Monday, 25 February 2019

Flowers for CraftyCardmakers

Hello Everyone,
We have a new challenge over at CCM today, and as your host I am looking for flowers on your creations.
This card was made for my sister's birthday in January.
The flowers and leaves are die cut from cardstock
which I then coated in Versamark ink and Frantage Embossing Powders.
The sentiments are from a Woodware stamp set designed by the wonderful Jane Gill.
The card was actually made to match the box that I had made for her.
The box was a plain wooden one from The Works which I coated with versamark ink and Frantage Powder.
I removed the lock and hinges before I covered the box to make it easier to work on.
The flowers have been created in the same manner as for the card.
The box had a fancy openwork lid,
so I placed a piece of matching cardstock on the underside of the lid.
I filled it with tiny chocolate bars which I think went down quite well.
I really hope that you can join us this time.
Don't forget to check out what the rest of my fabulous teamies have made, and please forgive me if I am a little tardy with my commenting. Nothing new there then I hear you say, but I am off to Kent tomorrow afternoon to be with my youngest daughter for the birth of her new baby. Well that is the plan anyway, but you know what babies are like, they haven't read the rule book lol.
Have a great day.
Happy Crafting and hugs.
Kimx

Friday, 14 April 2017

Birthday Funtime

Evening Everyone,
Oh well that's playtime over with for a while.
It has been lovely to get caught up with things even if it is only for a couple of days.
I began to think that the weather was going to do it's usual thing on Thursday when I visited my Mum and rain. But although it wasn't as glorious as Wednesday, it has still been very pleasant, in fact even today hasn't been too bad.... for a Bank Holiday.
One of the numerous cards that I needed to make during my time off was one for my Sin-in-law's birthday.
He always works so hard, bless him, that this is how he deserved to spend his birthday, playing on his PlayStation. 
I used an old LOTV topper cut out with a circular die and layered onto a piece of handmade background.
The background paper was created using a combination of inks and mica powder,
and of course plenty of stamping and embossing using Frantage powders.
We are using Imagination Stamps at Davina's tomorrow which will be fun, so I suppose playtime isn't completely over.
Hope you all have a wonderful weekend, what ever you are up to.
Happy Crafting and hugs
Kimx

Wednesday, 30 November 2016

Christmas Tags for Woodware

Morning Everyone
We are making Christmas tags for you at Woodware this week.
I made a pile of tags for my Christmas prezzies. How organised am I this year, thank you Dorothy.
I started my tags by creating a masterboard on a sheet of blue card stock. I also made one on a sheet of lighter blue card but I forgot to take a photo of that one.
I stamped and embossed the large snowflake first using thin household bleach and then Shabby Green Frantage powder. Create a stamp pad for the bleach out of a piece of cut and dry felt.
The paler blue card has been stamped with bleach and then Silver Detail Embossing powder. The bleach obviously wasn't quite dry in places and so there is a slightly ghosted image where a little of the powder has stuck.
I also stamped and embossed the sentiment from an old favourite stamp set and then painted the tiles with bleach to take out some of the colour.
I cut the masterboard up into tag sized strips and then used the fabulous Tag Top Punch to shape the tops of the tags.

The beauty of this punch is that I was able to use up all of the left over pieces, no matter how narrow to create beautiful tags.
Two pieces of card were enough to create 16 tags, each one just very slightly different.
I added the names using Peel-off letters stuck to white card, and finished them off with some dotty white ribbon.
Quick and easy, and such fun to make.
Have a great day.
Hugs Kimx

Friday, 18 November 2016

Table Decoration for Christmas

Morning Everyone,
I don't know about you, but I always seem to start the year with grand intentions of being super organised at Christmas, which always ends up being an epic fail.
Maybe this year will be different, you never know. I have kept up with my plan to make a few Christmas cards each month, so that's a start, and now here I am making a table decoration so maybe this is the year lol.
This week at WoodwareWitterings we are making table decorations for Christmas so I  decided that I would make an arrangement to go in the centre of our Christmas table.
I cut a square of thick cardstock (the back page from a paper pad) and covered it with a sheet of black and white stars from Craftwork Cards Noir de Luxe 8x8 pad. After sticking them together I tapped around the edge with a versamark clear ink pad and added Shabby White Frantage Embossing powder.
The holder for the candle has been created using the empty centre of a roll of DDST (I told you I never throw anything away!!) and a strip of gold card which I glued to the base.
I stamped and embossed the poinsettias from JGS360 Poinsettia Corner onto Mixed Media card stock using black versafine ink and then sponged them with dye based inks.
I then added more colour with a waterbrush, being more specific with my colouring.
I fussy cut two of the images and then cut the centre petals only from a third.
The holly leaves were die cut from gold and green card stock using Dreamweaver DL3005 Holly Die.
I added some Platinum glitter glue to the centres of the poinsettias and a little Star Dust glitter glue over everything else.
Of course I ended up with some extra images,
and a bit of 'Mop up background'
so I made a couple of Christmas cards to add to my stash.
I hope that you have been inspired to make a lovely decoration for your Christmas table, or even a couple of Christmas cards.
Happy Crafting and Hugs
Kimx