Followers

Sunday 31 May 2020

Black and White and Pink and Grey

Evening Everyone,
It's the end of another lovely weekend full of glorious sunshine.
Fortunately there has been a bit of a breeze, at least this morning when I went for my usual walk.
In any stamp collection that I am lucky enough to receive from Jane, there is always one stamp that is the easiest of the bunch to play with, and one that ends up being a bit of a favourite.
This beautiful floral stamp is just one such image.
I found it hard to stop making the samples with it.
I used white embossing on black card stock for the background and fussy cut images coloured with
a Cosmic Shimmer Summer Garden Watercolour Palette for this card.
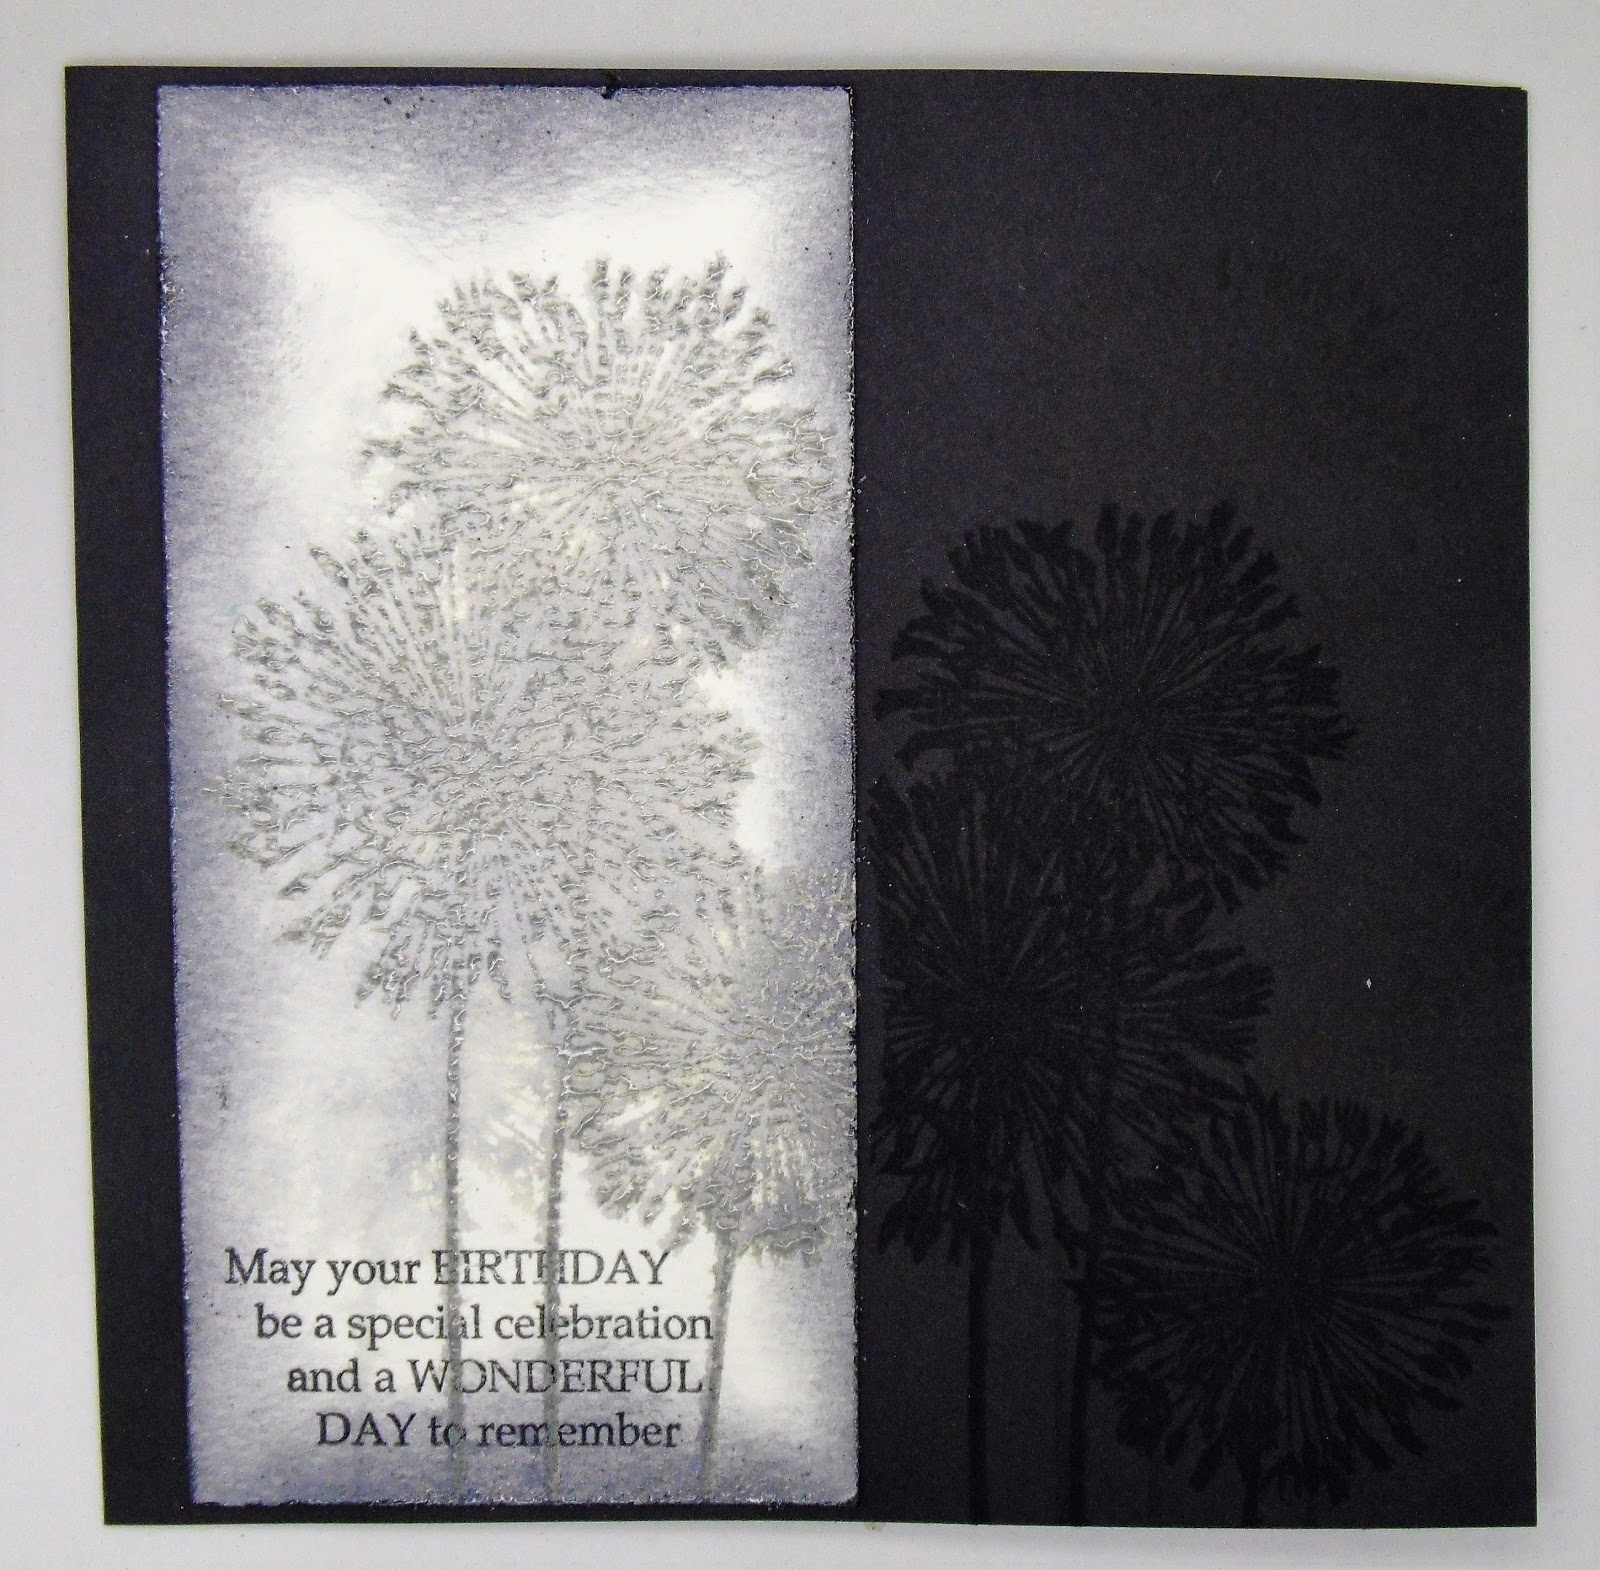
For this card I stamped and embossed in black on white card stock, and then painted around the flowers with grey ink for a monochrome look.
I added one of Jane's circular sentiments and some sheer ribbon, along with a silver glitter matte and layer.
This card is very similar, but with a pop of colour added with the circular sentiment and fine coloured border.
I'm sure that there will be a few more cards cropping up using this stamp set, but I will call it a day for now.
Thanks for stopping by, and enjoy the rest of your evening.
Stay safe and happy crafting.
Hugs Kimx

Saturday 30 May 2020

Cardmaking Housekeeping

Evening Everyone,
Another glorious day, although I must admit to having a hankering for some good old English rainfall.
I have been doing a little card making housekeeping. You know, the boring bit fitting inserts and making a few envelopes for odd shaped cards. I do hate it when the envelope doesn't fit the card. Sad or what!!
With housekeeping in mind I thought that I would go through a few more of my photographs to see what I still haven't blogged, before I take any more photos. I don't do normal housekeeping you understand :O)
This was made a while ago for a little girl that comes in to the garage with her parents. I haven't seen her for a while due to lockdown, but her dad 'Decaf Dave' as he is affectionately know, has started to come in again, so the world is definitely getting back to normal lol.
Better close my window and curtains, before I get attacked by moths. They know I don't like them I'm sure.
Happy weekend. Stay safe.
Hugs Kimx

Friday 29 May 2020

Oyster Catchers

Evening Everyone,
Just a quick post tonight, I absolutely shattered, and very glad that it is Friday.
I really should get my Fitbit up and running again....I must have walked miles today at the tills, and no means of checking how far lol.
A little taste of the seaside tonight with these lovely little oyster catchers, as designed by Jane Gill.
I used a Gelli Plate to create the background and then used my circle dies and did a little fussy cutting.
Off to bed now for some well earned shut eye.
Thanks for stopping by.
Hugs Kimx

Thursday 28 May 2020

Clean and Simple

Evening Everyone,
Thursday again, and once again 8pm crept up on me before I knew it.
My card tonight was made for Creative Expressions using one of Jane Gills lovely floral designs.
Now I don't usually do CAS cards, I'm a bit wary of white spaces. I love what other people do, the less is more look. Some how I never seem to be able to leave well alone, so I was really pleased with this card.
I created a narrow stamped, embossed and coloured panel to add to my square card after matting and layering it onto coordinating blue card stock.
I added a dry embossed panel to the base card, and then the coloured panel, that is it, job done.
Thanks for stopping by.
Stay safe
Hugs Kimx

Wednesday 27 May 2020

A Passion for Stamping

Evening Everyone,
Many years ago I was lucky enough to be asked to write a book on Rubber Stamping for Search Press in their Passion For Paper Craft series.
I included various techniques, with step by step instructions, including a chapter on Decorative Chalks.
 This card was based on that particular technique and is used in the book itself.
It uses some fabulous old Hero Arts stamps and a different colourway from the step by step one in the book. I also added mattes,layers and tags.
This is the card that was actually made for the book. I had to prepare all the steps for photography and then be the hand model for all the shots. I remember spending a couple of days in a very hot photography studio on some of the warmest days of that particular year.
Orange is not usually a colour that I choose very often, but I do love the softness that you get with the chalks. I liked it so much that I chose the chalked cards for the cover of the book.
I can't believe that the book was published in 2006, it doesn't seem that long. The sad thing is that I still have most of the cards from it in my card stash. 
I can't quite bring myself to send them to anyone, except a few special people that I know would really appreciate them that is.
Thanks for stopping by.
Hugs Kimx

Tuesday 26 May 2020

Foiled Florals

Evening Everyone,
I hope that you aren't too warm.
One of that last classes that we did before lockdown involved stencils and Sparkle Medium of various varieties, both Imagination and Cosmic Shimmer.
I do love the foiling technique, that I learnt from Sue at Imagination, many years ago.
I made the background using one of  her lovely floral stencils and a couple of colours of Starlights blended through the stencil onto the card. Once dry I foiled it with Sparkle Medium.
I stamped and embossed a sentiment onto a piece of cream card and layered it into the centre of the panel before embellishing it with flowers fussy cut from another stenciled panel, and some die cut foliage.
I used the same floral stencil and black glossy card stock for this card.
I used a Sue Wilson die for the central panel on this card, cut from the same black glossy card.
I raised it on fun foam to help give it dimension.
Thanks for stopping by.
Stay Safe and Craft.
Hugs Kimx

Monday 25 May 2020

Peek a Boo

Morning Everyone,
I hope that you are enjoying another Bank Holiday, there seem to have been so many of them just lately, although celebrating them is rather strange given the current circumstances.
I have had a very productive weekend making a couple more cute cards.
A friend asked me for a card for her Granddaughter who adores Dumbo.
I couldn't manage that, but I did have this fabulously cute image that I found over at Lee Holland's Etsy site.
He has the most cute images which can be bought as coloured, or uncoloured digis.
I decided that I would add a feather as a nod to the original film.
The feather and stamped sentiment are both from Woodware and were designed by Francoise Read.
I coloured the feather with Picked Raspberry Distress Ink and a clear sparkle pen.
I added Darcie using die cut letters from Carnation Crafts.
As usual I wasn't sure what I was going to do for the card so I printed out another image from Lee so that I could decide, which I didn't want to waste.
They can be printed two to a page, so I have another couple of cute cards to add to my stash.
Thanks for stopping by.
Stay safe and have a wonderfully crafty day.
Hugs
Kimx

Sunday 24 May 2020

Land Ahoy

Afternoon All,
I've just finished a very enjoyable Zoom session with my Granddaughter Emma so that she could read us all a story. See maybe I'm not such a dinosaur after all lol.
She chose a story called Wish Fish which by happy coincidence contains a Pirate in his ship.
This is one of the cards that I was making yesterday, now all finished and dry.
It uses one of the new Simply Print images from called LOTV called The Jolly Roger.
Talking of Dinosaurs, here is the card that I made for my friends Grandson, who absolutely loves them.
It uses another of the new images from LOTV called Birthday-Saurus.
I fussy cut the dinosaur and little boy and added it over the die cut image using Glue Gel.
The starry border die is from Magnolia and I used up lots of the waste to embellish the card.
The die cut alphabet is from Carnation Crafts. I have cut it out several times and stacked the letters before adding one cut from blue glitter card.
I hope that he will be enjoying his birthday despite all the rules and regulations which doubtless a 4 year old can't understand.
Stay Safe and Happy Crafting
Hugs Kimx

Saturday 23 May 2020

Mop Up Birthday Greetings

Evening All,
I've been a busy bee today working on a couple of cards for little people. They are in various stages of construction at the moment so I will leave them for another day, when everything is dry.
So instead here is a quick card that I made for Jane's recent show on Hochanda.
A 'Mop Up' background,
some sentiments,
a few gems, and faux stitching.
Thank goodness for my stamp platform which enabled me to create a little bit of a shadow on the sentiments.
Off to bed now, I need to get those cards finished early tomorrow so that one of them can be delivered to a special little boy for his birthday.
Stay safe.
Hugs Kimx

Friday 22 May 2020

Designer Boutique Agapanthus Steps

Hi All
I recently had to write step by step instructions for a card I made for a new release from Designer Boutique under the umbrella of Creative Expressions.
Having taken the time to write them, I thought that I might as well share them here with you.

1/ Trim a piece of mixed media card to a 15cm square and place into a stamping platform. Remove the white backing paper from the stamp and position on the left-hand side of the cardstock in the positioner. 
2/ Ink the stamp using Hickory Smoke Distress Oxide Ink. 
3/ Spritz the cardstock in the stamp positioner with water. Spritz the inked stamp with water and stamp onto the wet cardstock. 

4/ Move the card slightly to one side and spritz the stamp again, without reinking it. Stamp again onto the cardstock. Dry the stamped images with a Craft Heat tool and replace in the stamp positioner in its original position.

5/ Reink the stamp and stamp over the top of the original rather blurred image. Move the card stock again, spritz the stamp without reinking it and stamp again.

6/ Repeat these steps several more times until you are happy with your background.
7/ Make sure that your background is completely dry and then place it back in to the stamp positioner. Ink the stamp with Black Soot Distress Oxide Ink and stamp on to the right hand side of the panel. Cover the image with clear embossing powder and heat with a craft heat tool.
8/ Blend around the edges of the panel with Hickory Smoke Distress Oxide Ink.
9/ Attach 3 pieces of ribbon to the lower part of the panel. Use DSST on the rear of the cardstock to keep the ribbon in place. Attach each layer with DSST one at a time.
10/ Layer the finished panel on to black cardstock, and then silver, before mounting on to a large square card.
11/ Stick 3 Finishing Touches Small Circle Dazzles to the top right hand side of the card.
12/ Tie a small bow to the narrowest of the three ribbons attached to the bottom of the card.
Of course as always I had a left over piece to finish off.
I hope that these are useful.
Have a great weekend. Stay safe and craft.
Hugs Kimx