Followers

Showing posts with label dreamweaver brass stencils. Show all posts

Sunday, 13 December 2020

Hot Air Balloon

 Evening Everyone,

I hope that you have all had a wonderful weekend and are not too stressed out with all the preperations for Christmas which is just around the corner.

My good friend Gill has been reminding us this week about brass stencils in her 'Way to Go Wednesday' on Facebook. 
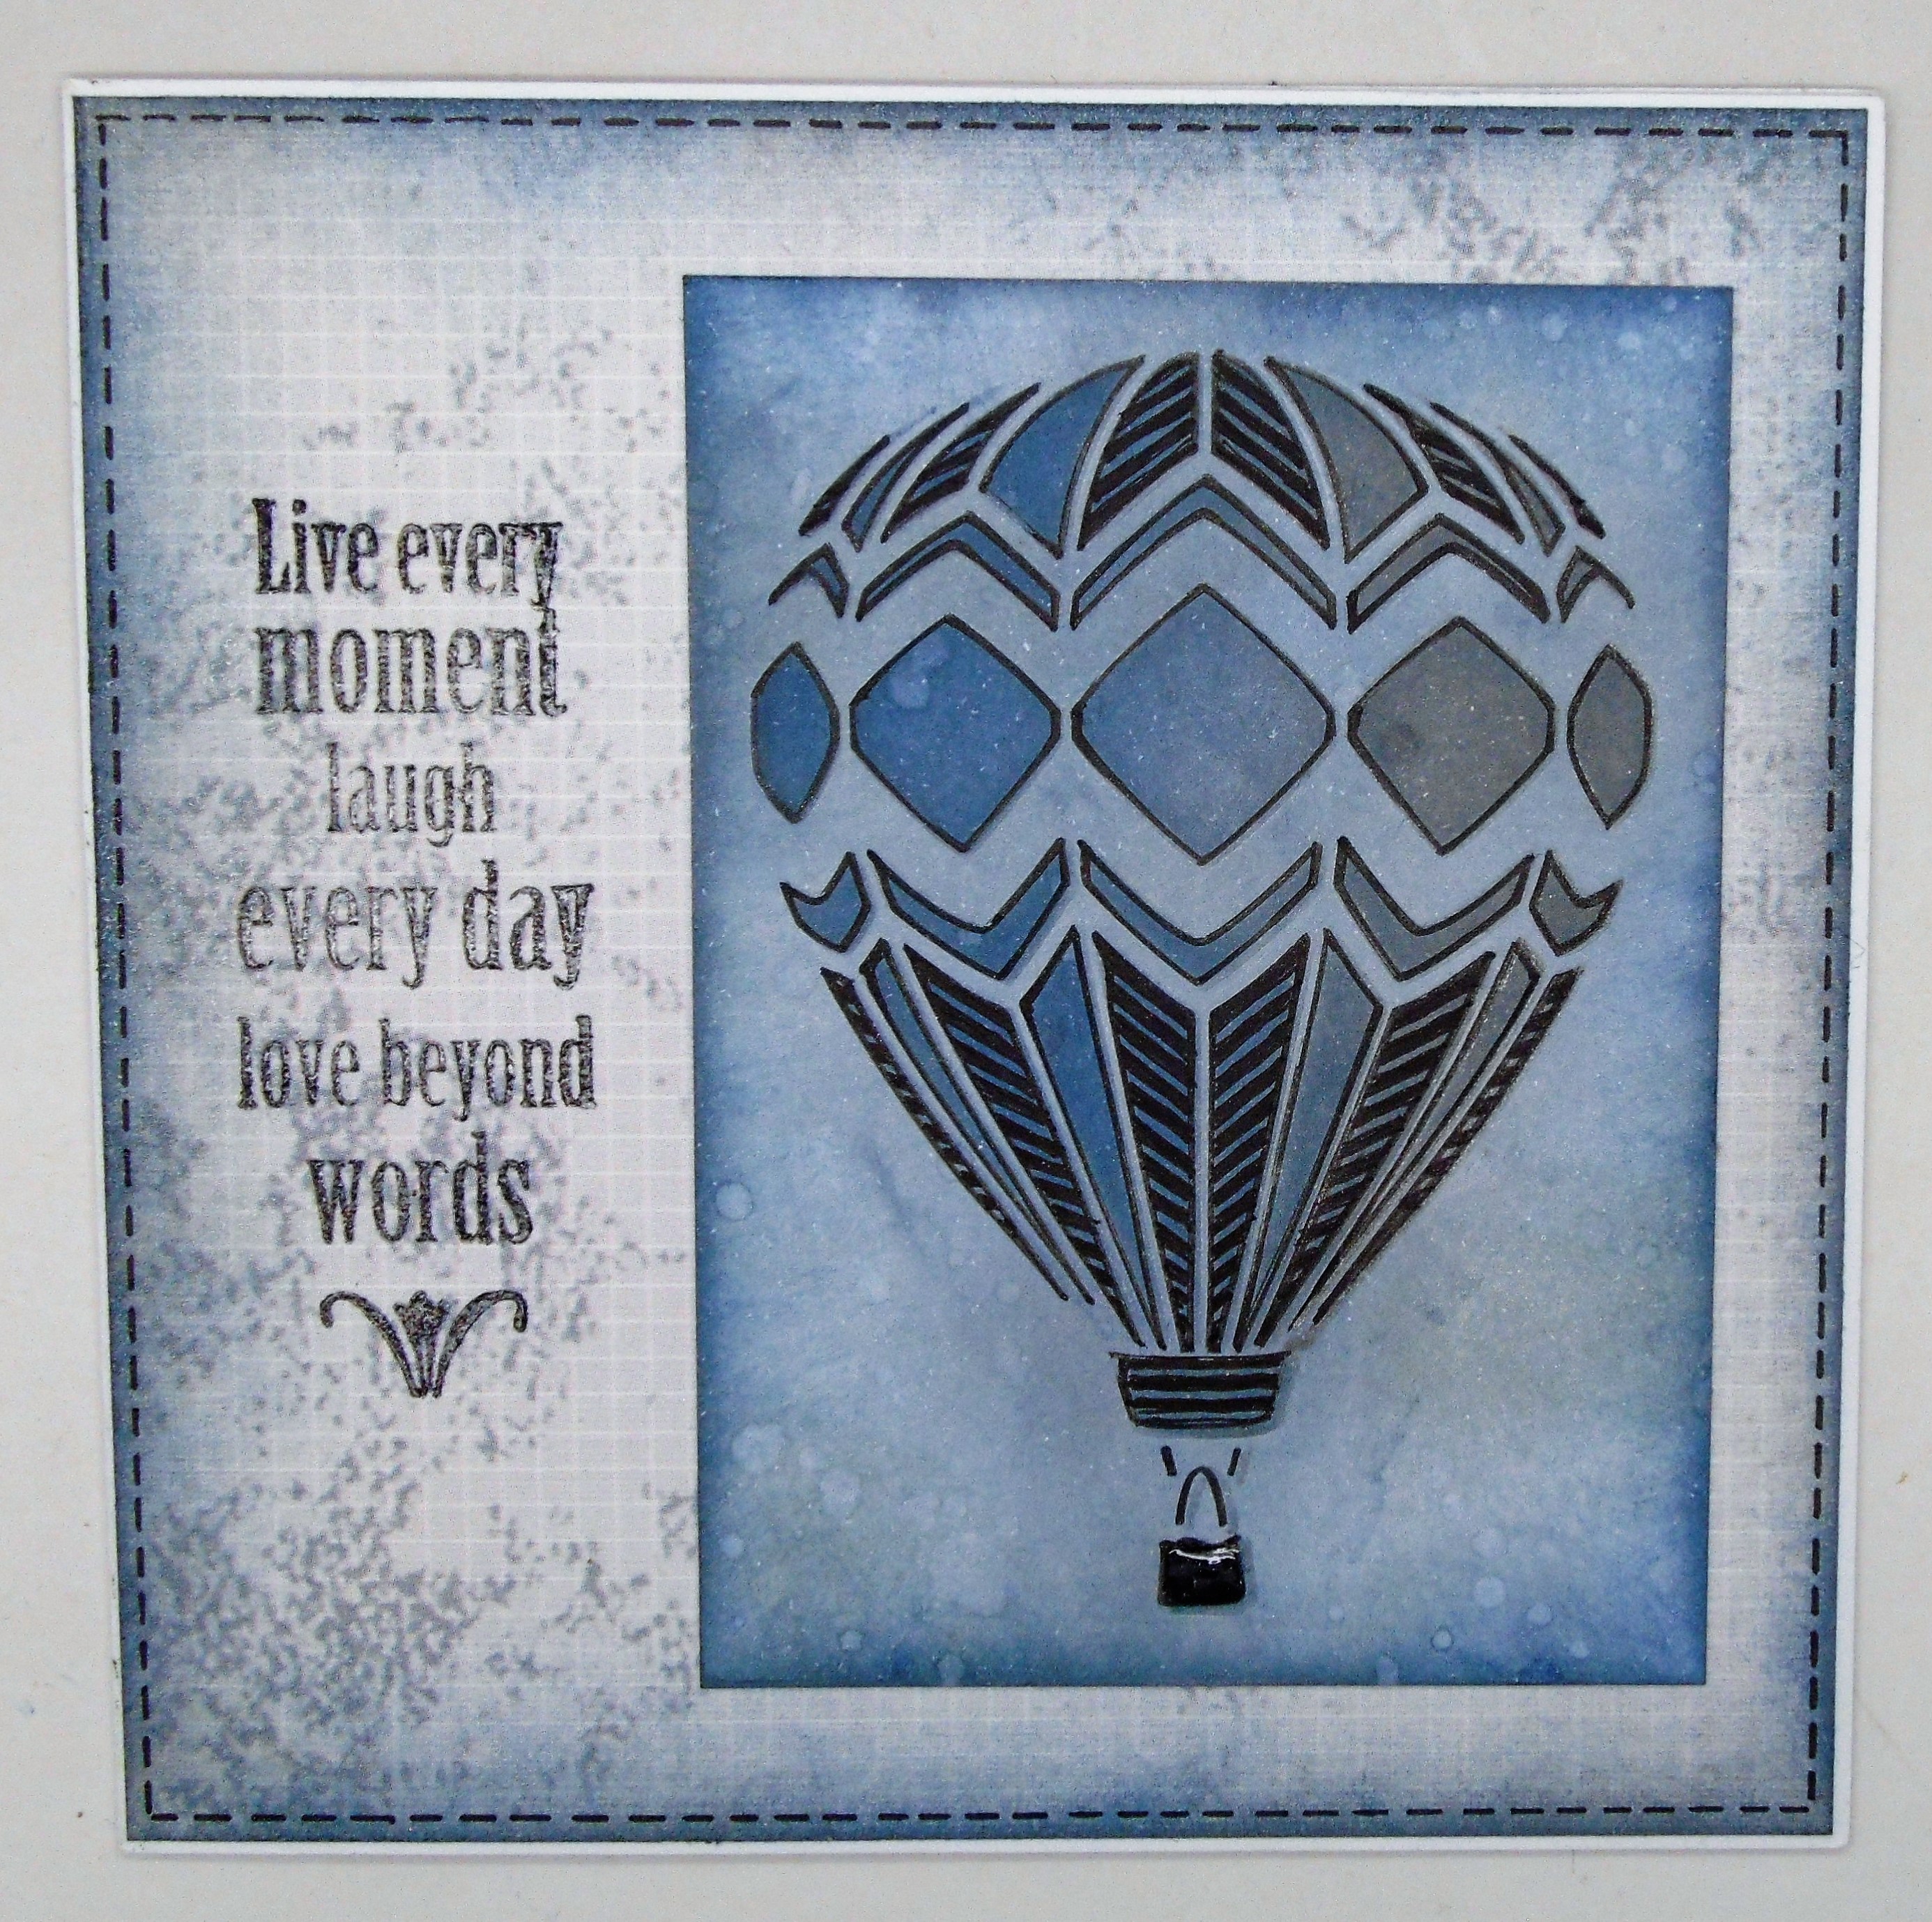
This is definitely not a Christmas card, but it does use a lovely Dreamweaver brass stencil.
I drew round the design  with a black micron pen and with the stencil in place. I then added a little bit of basic zendoodle.
In answer to Gill's question you can use them through an embossing machine, so once I had finished my 'tangling' I placed the stencil back in place and ran it through my Cuttlebug  with the appropriate sandwich for that machine.

It is very hard to show in the photographs but it does give it a little extra dimension.

I do like to be reminded of some of that stash that I have in my craft room.

My last sleepover tonight, so we are having a little bit of an impromptu movie night since Emma's class has been shut down early due to a case of Covid. We had lots of tears because she wouldn't see all her friends again before Christmas, but she decided that there was definitely a plus side.........................no spelling test.

Thanks for stopping by.

Stay safe and hugs

Kimx

Saturday, 16 April 2016

Vintage and Lace with Woodware

Morning Everyone,
I hope that you have had a good week.
Today it is my turn to share a card with you over at Woodware.
This week we are looking at Vintage and Lace.
I have stamped and embossed JGS308 Heart Garden in gold and then coloured it using Watercolour Pearlex.
I used a Dreamweaver stencil to create the background panel, dry embossed and coloured using brown dye based ink. I attached a strip of lace and ribbon to the panel before adding it to the main card.
I stamped and embossed the same image around the edges of the main card and then sponged the whole thing with dye based inks.
A few tiny pearls continue the vintage theme.
I hope that you will check out what the rest of the team have made this week HERE.
Have a great weekend.
Hugs Kimx

Monday, 26 October 2015

Beware Picture Heavy Post

Evening Everyone,
Here we are at the start of another week, and I am now officially on count down till my bi-annual holiday to Sirstampalot.
I can't wait. As the Grandkids would say, only 5 more sleeps lol.
I am trying to get organised and ahead with a few of my crafty commitments so that I can concentrate on play when I am on holiday.
A couple of weeks ago Dorothy set us a 'Flourish' challenge over at Woodware, and as usual I got a little bit carried away.
Most of them use stencil paste and this beautiful Holly Flourish stencil from Dreamweaver.
This one just uses dye based ink through the stencil which was then heat embossed with clear embossing powder.
I love this sentiment, such a useful size.
The central panel on this card has also been created using stencil paste and dye based ink,
but the red background card has been stencilled with Versamark ink and then brushed with Dreamweaver Mica powders.
The background to this final card has also been created using stencil paste onto a piece of background paper from my stash which has then been covered with inks, gilding flakes and mica powder.
Better get to bed now.
Bye for now.
Hugs Kimx

Saturday, 17 October 2015

Woodware blog - Flourishes

Morning All,
This week Dorothy has challenged the Girls at Woodware to create something with a flourish.
I wasn't sure what to do for this challenge so I thought a good place to start was to type flourish in to the Woodware website to see what it came up with.
Among the goodies with flourish in the title was this fabulous Dreamweaver Christmas stencil Holly Flourish, so as I have it in my stash it seemed like a very good place to start.
First I applied Dreamweaver Embossing paste through the stencil onto a piece of white card stock.
When it was dry I replaced the stencil and added colour using dye based inks with a finger dauber.
I trimmed the panel and distressed the edges with a very old pinecone versacolour cube, before layering it onto a piece of background paper from my Woodware stash.
For the finishing touches I added glossy accents and stardust glitter glue to the berries and tips of the flourishes, and a sentiment from one of Jane's new stamp sets Trio of Trees along with some tiny gold metals.
As usual I got carried away finishing off all the bits and pieces that I was playing with so there are several other cards that I will have to post for you.
I hope that you have enjoyed our Flourishes for this week, and lets hope that the Woodware blog is back up and running again next week.
Have a good weekend.
Happy Crafting and Hugs
Kimx

Tuesday, 18 August 2015

Mechanical Cards at Woodware

Hi All
This week the Girls at Woodware are looking at Mechanical Cards, and I am thrilled to have been asked to help them out.
 I really wasn't sure what Dorothy expected so this is my take on the theme.
I have created the background to my card using a fabulous Gears stencil from Dreamweaver, some silver Gilding Wax and a stencil brush.
I love this shoe stamp from Stampendous.
I so wish that I were still able to wear a pair of shoes that looked this good.
What ever happened to the 4 inch heels that I used to wear all the time when the kids were small.
I have watercoloured the image with dye based ink and then added silver and gold Gelli Roll Glaze pen and some Glossy Accents on the clock face..
I created an extra couple of panels using the Gears stencil and my Cuttlebug and then brushed them with more silver Gilding Wax
I cut out some of the cogs using circular punches and added them to the card.
I hope that you like the card.
I wonder what the Team come up with for the rest of the week.
Thanks for stopping by.
Happy Crafting and hugs
Kimx

Thursday, 14 May 2015

A new Sketch at Woodware

Hi All
I'm back at Woodware, filling in for Jane this time.
This week they have a sketch challenge, and so here is my take on it.

I actually turned the sketch on it's head.
I used a piece of background created using a Dreamweaver stencil and dye based ink.
I also added a little gilding wax although it doesn't show up in the picture.
The central panel is one of Jane Gill's bubble bloom designs which I coloured using the 'Wet Watercolour Technique' and then added some glitter glue and glossy accents.
The sentiment has been added to a stamped banner, and the paper at the bottom of the card is from one of the Craftwork Cards paper pads that Woodware also sell.
Why not pop over to the Woodware blog and check out what the rest of the team have come up with to inspire you.
Hugs Kimx


Tuesday, 10 February 2015

Wishing you a Lifetime of Love

Evening Everyone,
Well I managed to get up in time for work this morning, AND I got my card finished for the Boss, so all is good.
Of course just how tired I am won't hit me properly till tomorrow, although I do confess to a small 'Granny Nap' this afternoon lol.
Here finally is my card for the latest challenge over at CCM&More, where Lorraine would like to see Love themed creations. So lots of Love, Love, Love be it Valentines, Wedding, Engagement or just plain love and romance.
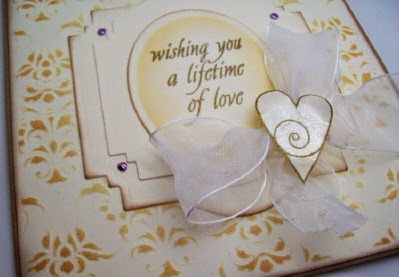
My card could be made for a Wedding or an Anniversary and uses some of the new stamps from Woodware.
The background has been created using a lovely Dreamweaver Stencil which I dry embossed in my Cuttlebug and then brushed with Distress inks while the stencil was still in place.
 
The sentiment is also from another new Woodware stamp set, stamped, embossed, die cut and layered using Nesties.
Finishing touches are a ribbon bow, pearls and a stamped, embossed and fussy cut heart.
Don't forget to check out what the rest of my fabulous team mates have come up with to inspire you.
Off to bed now before I fall asleep sitting up.
See you tomorrow.
Hugs Kimx
Wednesday, 15 October 2014

Birthday Wishes Jane, sorry it's late

Evening Everyone.
October is a very Birthday heavy month for me. Well all the best people have October birthdays don't they lol.
I have to admit that I am very grateful for my stash of cards this month. I managed to finish one card today and am now in agony with my arm. Off to see the Doctor tomorrow as my certificate is due to run out, but I don't see me being signed back to work yet!
One of the cards that I need to post (yes I know some of them are a little late) is this one for the lovely Jane Gill who celebrated her birthday three days after mine.
Of course it seemed only right and proper to use one of her designs when making the card.
I stamped and embossed the grasses using Onyx Black Versafine ink and clear embossing powder, and then sponged around the edges with Pumice Stone Distress ink.
The pattern at the bottom of the card has been created using a Dreamweaver stencil, Versamark ink and clear embossing powder. The paper at the top is from my stash.
I have to walk past the Post Office on the way to the doctors tomorrow so I have no excuse for not posting them all.
In the mean time I think I had better rest my elbow before I get told off. They did say gentle exercise not sit and do nothing so I haven't been totally out of line!
Hugs Kimx

Saturday, 12 July 2014

Poppies ...... as we Remember with Woodware

Evening,
I've had a fabulous day catching up with some 'crafty' things and starting my samples for Hobby Art.
One of the things that I needed to finish was a card for the Woodware challenge.
As usual it is the last day of the challenge before I manage to get something posted lol.
This week the challenge has been set by one of their retail shops LLinda's Craft Shop and she has chosen
The Poppy .......... as We Remember
Once again I have managed to find some bits in my box that I could make use of, and funnily enough the main panel actually uses the same Dreamwaver Tall Poppy Stencil that Linda used in her fabulous creation.
How different my card looks though. I have used my stencil, some Red Metallic sheet and my Cuttlebug machine.
I have used my Dreamweaver Stencils so much more now that I know that I can use them with my Embossing Machine. Do make sure that you get the right sandwich though so that you don't bend the stencil.
The plates on my machine are rather well worn, but this has added a rather nice distressed look to the finished piece. I used some permanent black pen on the center of the Poppy.
I added some Alcohol Ink to tone down the red of the metal.
I found two pieces of metal in my box with the Poppies already embossed on them, so I decided to finish a second card. The background is from my large stash of papers made using my Creative Palette, bubble wrap and inks.
This piece of metal was silver to start with and once again I added some Alcohol Inks.
I stamped and embossed some Wild Flowers onto the background paper and added a sentiment stamped onto a piece of acetate.
I notice that Dorothy hasn't added a link again this week, but as she is currently in Skipton with Judith and the rest of the Gang getting ready for the Retailer Retreat which starts tomorrow I think that she can be forgiven for the over sight.
Off to get some dinner, and then it is back to the Craft Room where I have a few more samples to make.
Have a good evening.
Hugs Kimx

Saturday, 1 February 2014

Moody Blues

Evening Everyone,
I managed to make it to another fabulous afternoon at Davina's.
It really is totally amazing how much stuff I manage to take with me to class.
I had enlisted the Grandchildren to help me carry things as we thought that Sylvie, who gives me a lift, wouldn't be able to get up the road because of the flooding, so I would have to bring everything to meet her!!
As it turns out the 'Men from the Council' managed to clear the drains and most of the flood water subsided so Sylvie was able to meet me at my front door.
I decided that I would split today's class it into 3 parts since there were so many different techniques to show them using Embossing Folders.
Of course another technique that I had forgotten about features on my card this evening.
The tree panel has been created using a Dreamweaver Brass Stencil (I know its not a folder, but it still embosses) which I had spritzed with Adirondack Colourwash sprays.
I ran it through my Cuttlebug which transferred the ink to the card stock and gave me the dry embossed look. It also cleaned most of the ink from the stencil which was a bit of a result.
I stamped and embossed the sentiment onto the tree panel and then matt and layered it onto a card which I had stamped with various leaves.
Some Card Candi finishes the whole thing off.
I think I can see a part 4 to the embossing classes so that we can play with brass stencils as well.
What do you think Girls, are you up for an extra afternoon of play time?
Happy Crafting and hugs Kimx