Followers

Showing posts with label tag book. Show all posts

Tuesday, 6 July 2021

Statement Sentiments

Evening All,

As promised here are a couple of samples from Saturdays class.

I created the panel for this card whilst showing the ladies how to use the Distress Oxide inks and mixed media or watercolour card stock to make a 'Mop Up Background'.
I love all the fabulous colours and so I decided that it didn't need anything more than a large die cut sentiment.
I also added a stamped sentiment across the bottom of the panel.
I had trimmed a piece from the bottom of the previous panel to make the first card, so I decided to turn it in to a second smaller one.
Once again I used a large die cut sentiment, only this time I die cut it from the panel itself and added dimension by layering it on to craft foam.
I remembered to create a panel for each of my tags. The left hand one is using glossy card stock and the right, mixed media/watercolour card.
Although the ink has been blended on to the background of this card, I figured that it fitted in with the others having using a large statement die.
I also used a stencil and embossing machine to give some added dimension to the background, and then added a little gilding wax.
Thanks for stopping by.
Hugs Kimx


Thursday, 1 July 2021

Thinking of You with Stencils

Evening All,

Here are the last of my cards from the class on Stencils and Stamps.

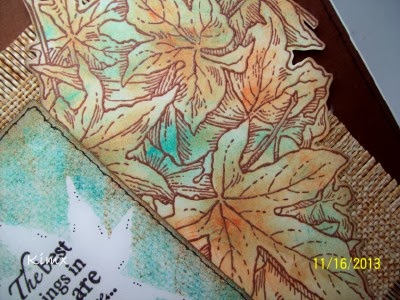
Once again I used this fabulous stencil from Altenew, but this time I kept it monochrome.
I made them as Sympathy/Thinking of You cards,  
but the idea would work every bit as well for an Anniversary or Birthday.
Same technique, but a different floral stencil, once again worked in monochrome colours.
I added a few gems to both cards,
along with a stamped and embossed sentiment.
These last two cards feature a couple of circular Clarity floral stencils. 
They are only small, but a card doesn't always have to be huge. They are sent with love and best wishes what ever their size.
Better get my tag written for class on Saturday or I'll get a ticking off :O)
Several years ago I started a tag book for the Girls, inspired by a class that I had done at SirStampalot a few months previous. The idea of it is to create a tag to go with each class to remind the Girls of what they have done so that they can more easily recreate it later. Each tag is supplied with instructions on the technique that they have played with, and a piece of appropriate cardstock for them to create a visual prompt. I supply the tag and instructions, they supply the artwork lol.
I tried very hard to supply tag instructions for each of the classes pre lockdown, but time just got away from me sometimes, so I am determined not to fall into the same trap now that classes have started up again.
Thanks for stopping by, I hope that you liked what you saw.
Happy Crafting and Hugs
Kimx


Sunday, 23 February 2014

Brilliant Brilliance

Evening Everyone
We had another fabulous class at Davina's last Saturday using Brilliance Ink pads.
It has been a while since I last used mine, distress inks are my go to pads at the moment, so I had forgotten what great pads these are. They have such a lovely sheen to them and they sponge beautifully.
I thought that we would do some masking with them using peel-offs and post-it notes.
For the class tag and this particular set of cards I used peel-offs to create the masks. I will share the post-it note cards in another blog post.
I placed the peel-offs and on this card torn paper onto white card stock and then gently sponged with Brilliance inks. Once you have finished sponging remove the peel-offs and paper to create a lovely background.
I also painted a couple of the peel-off designs and fussy cut them to add an accent to the lower corner of the tag and cards.
The sentiment (Yesterday, Tomorrow, Today) is from Woodware stamp set stamped out using Lightening Black Brilliance ink.
I must get re-inkers for some of my pads as you can see, so I can feel a bit of a spending spree coming on.
I really had forgotten what fun it is to play with peel-offs. Sorry Shaz :O)
Back to the grind tomorrow. I have taken to leaving my colouring pencils and some stamped images in my box at work. Lets hope that the road has re-opened and we will be really busy. Some how though I'm not holding my breathe lol.
Hags Kimx

Saturday, 16 November 2013

Inspired by Davina

As I expected class today was one long round of playing with the Magic Stamp.
Not a single card was made but I think a good time was had by all.
Here are just a few of the little pieces of Art that were created.
As I said yesterday I had searched through my craft room for anything suitable to use with the Magic Stamp.
Sylvie and I also picked up a few leaves on our way since they always work well.
In fact there is a fabulous Japanese Maple in the front garden at Davina's so we helped out Mother Nature and saved Davina having to sweep up all those leaves.
The central panel on my card was actually inspired by a piece that Davina originally made. You see I always learn something on a class, or pick up an idea or two.
The Magic Stamp was heated and then pressed into the Burlap Fabric Square. 
Once Pigment ink has been applied using a Colorbox Queue a real Maple Leaf was placed on the white cardstock and then the inked Magic Stamp was stamped over the top. Once the maple leaf was removed it left an open space into which I stamped and embossed the sentiment.
The fabulous stamped and embossed leafy panel is a Stampendous stamp which I have coloured using Pigment inks and the Direct to Paper technique.
The single leaf  has been cut from the leafy panel and layered onto some of the threads taken from around the edge of the Burlap fabric square.
Of course there had to be a tag for the Girls to add to their books, and some more bits and pieces to finish off. So you know what I will be up to tomorrow lol.
Hugs Kimx


Thursday, 23 May 2013

Glorious Gold Leaf

Evening Everyone.
OK, I admit it, the weather today has been all my fault, but at least I have been able to work with my Gold Leaf without wearing quite so much of it lol.
I have just finished my prep for class on Saturday. I still have to write the instructions, but I can do that tomorrow morning, when I'm not at work :O)
 I have used the Gold Leaf and Sticky Embossing Powder on this card and the tag for their book.
The stamp is the amazing Stampendous CRR164 Cling Tree Poem. It was one of those 'Must Have' stamps as soon as I saw it.
Once I had covered the stamped image with the Gold Leaf I created the background using Decorating Chalks applied with a cotton wool ball.
The Tag for their book was made in the same way, just in different colours.
I would like to enter this into the following challenges
Word Art Wednesday - Anything Goes
Woodware Challenge - Colours of the Earth
Incy Wincy Designs Challenge - Metal Mania (I hope that Gold Leaf counts)
Off to bed now, more crafting to do tomorrow.
Night night.
hugs Kimx