Followers

Showing posts with label Stampendous. Show all posts

Friday, 15 May 2020

Every Bit as Pretty in Pink

Evening Everyone,
I found another card that I made using the fabulous Agapanthus stamp set from Stampendous.
And I think that you will agree that it looks every bit as pretty in pinks.
I haven't used chalks in a while. I really must get them out again, I love the effect you get with them.
Have a great weekend, but stay safe.
Hugs Kimx

Thursday, 14 May 2020

Lets Say Thank You

Evening Everyone,
I can't believe that it's Thursday again, and time to clap for the NHS and everyone else that is helping to keep the country going.
I have definitely noticed that there seem to be more people out and about, and the roads are busier
over the last few days.
Here are a series of Thank you cards that I made a while ago using one of my favourite Agapanthus stamps by Stampendous, versamark and Decorating Chalks.
Orange is not usually a colour that I reach for, but I love this set of cards.
The little gold gems are actually peel-off dots with glossy accents on them.
These were actually made in a class on Chalks where we made a box of cards to give as a gift.
This stamp is fabulous with this technique.
I created several large pieces,
 that I cut up to make smaller cards to fit in the box.
I can't remember who made the sentiment stamp, but I do like the font.
I made the box for the cards, but never actually got around to giving them to anyone. As it had got a bit battered I decided to repurpose the lid and turn it in to another card.
Thanks for stopping by.
Stay safe and craft.
Hugs Kimx

Monday, 2 March 2020

Watercolour Snowflakes

Evening Everyone,
Thought I would share another couple of Christmas cards with you.
Apparently my friend saw them gritting this afternoon so I do hope that this isn't a forecast for what is to come.
The stamped snowflake is from an old wooden cube stamp that I think was designed by Stampendous.
Four images attached to a wooden cube, lovely designs, but a beast to store. 
I'm not seeing any signs of the white stuff out of my window, so lets hope that it was all a false alarm.
Have a great evening.
Hugs Kimx

Monday, 27 January 2020

Black and white at CCM

Evening Everyone,
Today saw the start of a new challenge over at CCM, and it is one of my favourites 'Black and White'
The problem that I had here was deciding on which card I would choose to share with you.
This fabulous old Stampendous stamp worked brilliantly for this watercolour technique that we played with in class a while ago.
I used Black Soot distress ink on the stamp which I then stamped onto a piece of very wet watercolour cardstock.
The water wicks out the ink to give a very diffused image.
Once the card has dried (either with heat or naturally) stamp back over the top with a black dye based ink pad and emboss with clear embossing powder.
Here I used the same technique but used a couple of different colours on the stamp for the first stamping.
I did a little bit of decoupage in the corner of this one for a bit of added dimension.
I have to say that the advent of the Stamping Platforms or Misti make this a very easy technique to achieve. I'm not sure that I would have been able to stamp my secondary image without one of them, especially as this is a foam mounted stamp.
I hope that you will find the time to join us for this latest challenge, and please stop by to see all the wonderful samples that my teamies have come up with to inspire you.
Have a great week.
Happy Crafting and hugs
Kimx

Tuesday, 15 November 2016

Halloween Revisited


Morning Everyone
Before we get too far away from Halloween let me share a couple more cards that I made recently with the intention of adding them to my blog post HERE.

                          
As you know I am on a bit of a mission to finish off all the extra bits and pieces that I seem to create when making a card.
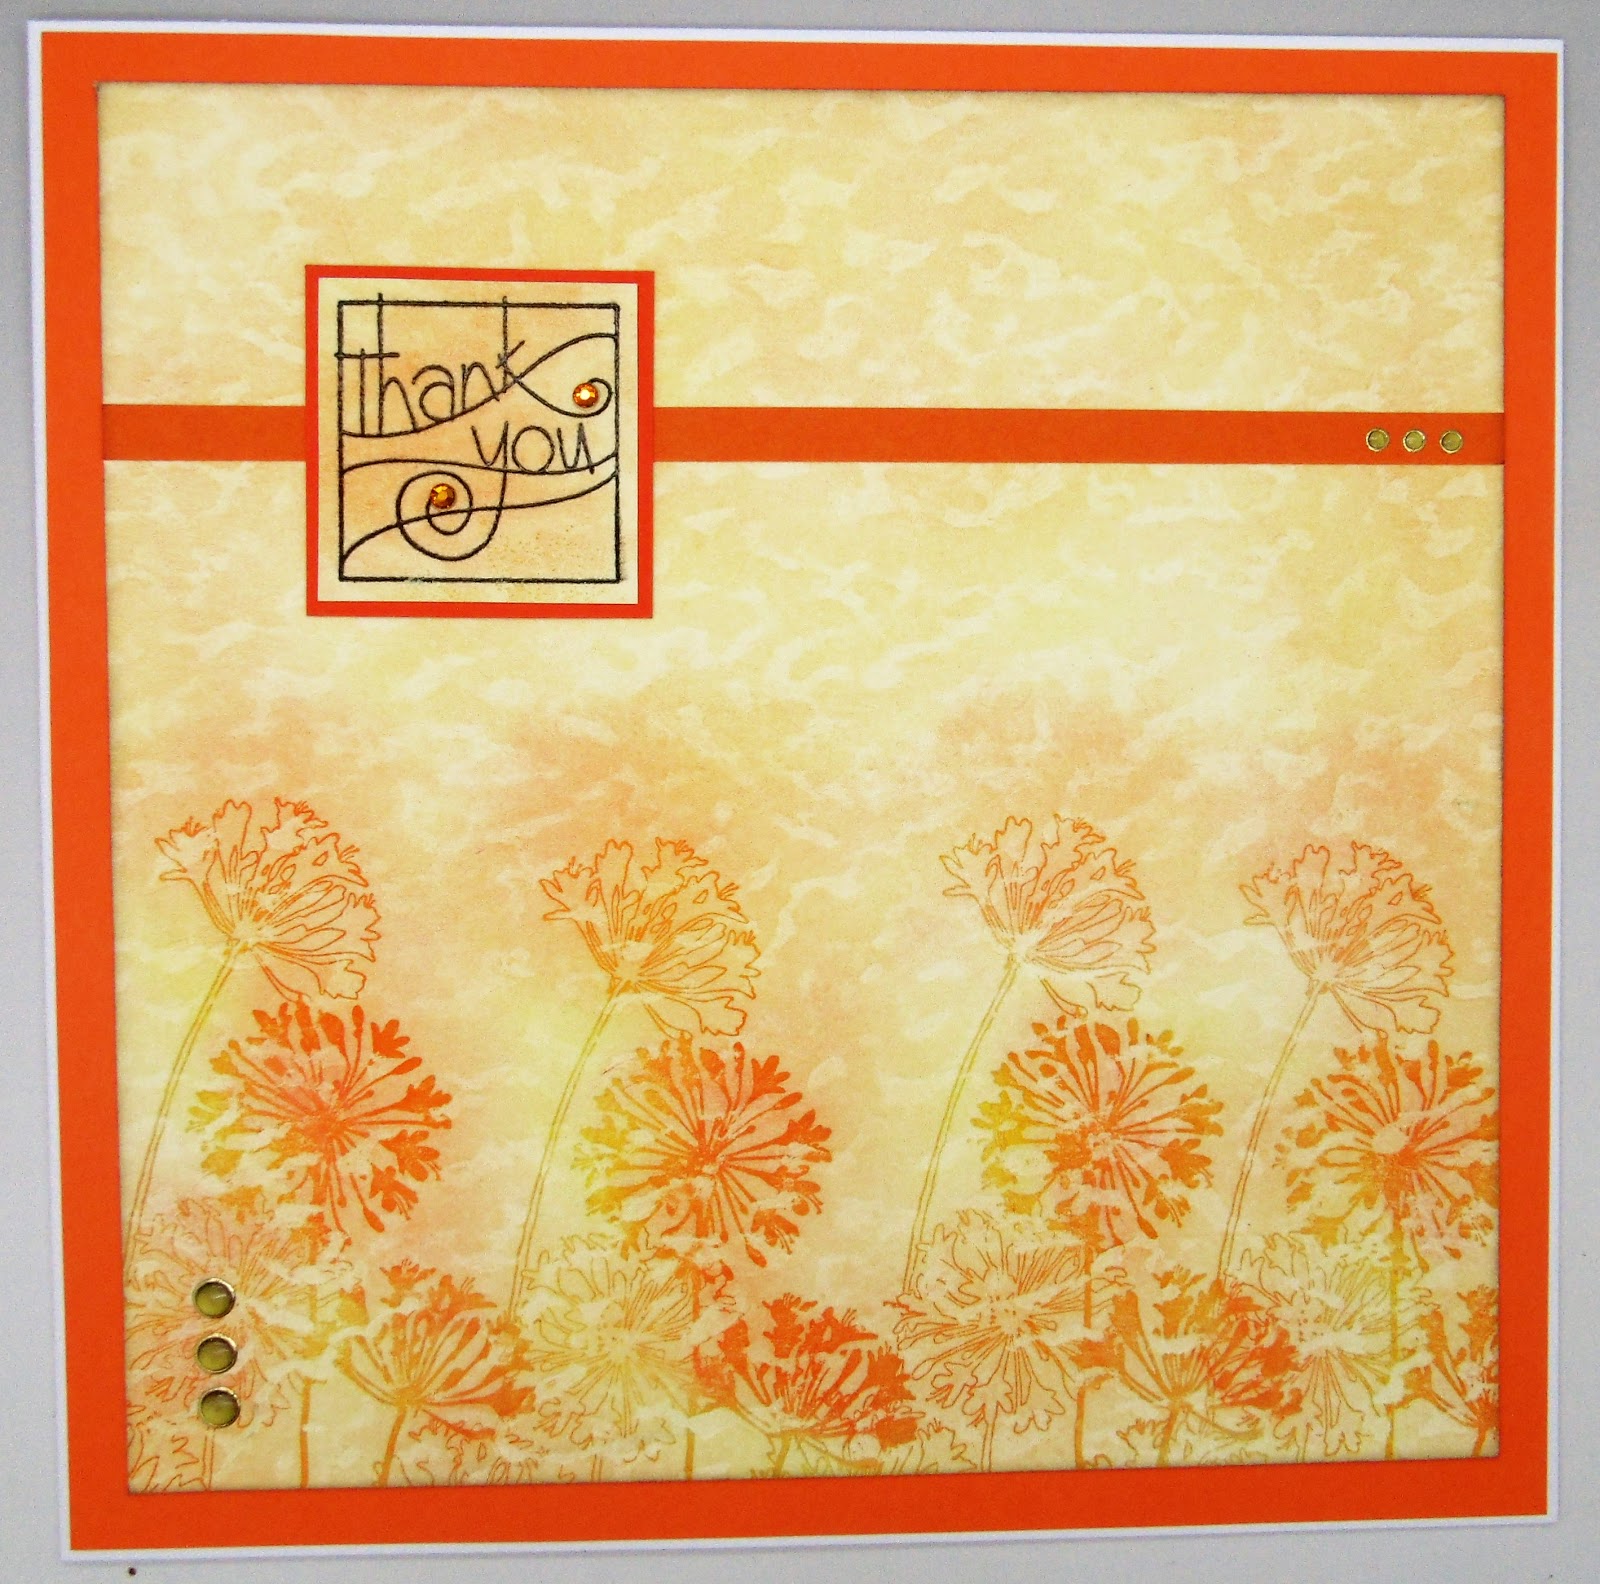
The background to this card was made with the mop up from my craft sheet when I was making my Halloween project for CraftyCardmakers and WoodwareWitterings.
I stamped and embossed over the background using Stampendous SSC1023 Damask Fall and a black Versafine ink pad.
 I used a white Gelli Roll glaze pen to add some dots and swirls,
and a sentiment die cut from white card.
Perhaps I had better share the card that I made in order to create the mess that needed mopping up.
The small panel is made using acetate and alcohol inks which I layered over some more damask leaves this time stamped and embossed using white powder.
I do love this rather cute witch and her little batty friend. They are from an old Woodware stamp set called FRCL203 Spooky Tots.
I think my Girls are making up for a deprived childhood. 
I was never into Halloween when they were small, but they love it now and the house is always decorated with pumpkins and spiders webs and all manner of scary things.
They carved several pumpkins including these two.
Emma had a fun time shopping with her Mum,
And Ciaran really got in to the spirit of it with help from some fantastic makeup courtesy of his big sister. Definitely a makeup artist in the making I think.
The house always seems a little drab after everything has been taken down. Still I suppose it's only a couple more weeks till the Christmas decorations come out and we are in danger of overloading the National Grid. 
My Girls are very into Christmas as well lol.
Have a great day. Happy Crafting and hugs
Kimx

Wednesday, 7 September 2016

Sketch 54 at WoodwareWitterings

Morning Everyone,
We have a new sketch to inspire you over at WoodwareWitterings and today it is my turn to share.
I do love a sketch, it is a great place to start if you are having a bit of a creative block, and it is also a good way of using up some of the abundant bits and pieces from your stash.
The stamped and embossed panel is from that stash and is a very old Stampendous stamp Scenic Poppies.
I covered the poppes and the three trees with Liquid Masking Fluid which you have to leave to dry and then I sponged the entire panel with dye based inks.
Once you have finished colouring the background rub the masking fluid away with your finger to reveal nice white images ready to colour. I used Alchol pens for this and then added a little bit of shine with a versamark pen and clear embossing powder.
The green panel also involves masking, this time with a large post it note and a black pigment ink pad.
As usual I have made a second card, this time using part of an old Magenta stamp Flower Pot Trio and more of the masked background.
Here is the sketch, have a great time being inspired by it.
Happy Crafting and hugs
Kimx

Monday, 27 June 2016

Shabby Chic/Distressed for CraftyCardmakers and WoodwareWitterings

Morning Everyone.
We are starting a new challenge over at CraftyCardmakers today, and as Woodware are sponsoring them we are all playing along and I am first to share.
I am also on the CCM DT so you are getting a bit of an early sneak peek of the challenge today.
I always struggle a bit with shabby chic/distressed, so I paid a visit to my favourite place for some much needed inspiration....Pinterest.
I chose to work with a couple of Stampendous butterfly stamps and a brown and blue colour combo.
The central panel was stamped and embossed in white and then sponged with blue and brown Graphic 45 inks. I also added another butterfly using silicon.
The background paper is from a Craftwork Cards paper pad which I have also stamped and embossed with the Butterfly Music stamp and then sponged with a little more of the inks.
I added some stencelling in the background using a Dutch Doobadoo stencil and some of the blue ink.
The leaves were die cut from coordinating papers and then the edges were distressed the same way as all of the other panels, with a distressing tool.
I also added some flowers, threads (pulled from a jute fabric square) and home made Card Candi.
As usual I made a second card from my leftover playing pieces.
The 3D butterfly was created from vellum this time.
I hope that you will join us at WoodwareWitterings this week and enter into the challenge at CCM.
I look forward to catching up with you all and seeing what you have been inspired to make.
Have a great day.
Hugs Kimx


Monday, 4 April 2016

House Mouse/Dreamweaver - with Stampendous and Woodware week 2


Morning Everyone,
I am taking part in a bloghop  over the next two weeks we are going around the world with our friends at Stampendous.
STM_HMFC215hop_banner4
For almost 3 years now Stampendous have had the license to distribute the stamps of House-Mouse Designs® there are now over 200 high quality  rubber stamps in the range, not only the mice, but also HappyHoppers and Gruffies. To celebrate this The House-Mouse and Friends Monday Challenge Blog is happy to be hosting a unique challenge for everyone for the next two weeks. The HMFMCB Design Team is teaming up with the Stampendous Design Team, The Stencil Specialists (distributors of Stampendous and Dreamweaver Stencils in Australia) plus us Woodware Craft Collection Blog Design Team (distributors of Stampendous and Dreamweaver Stencils in the UK) for a huge Blog Challenge.
To make it extra special we will be using not only the cuddly creatures but combining them with the wonderful Dreamweaver Stencils which are also part of the Stampendous stable. 
We have prizes so would love you to join in with us as we hop around the world for 2 whole weeks, REMEMBER the hosts are House-Mouse and Friends and they are a challenge blog so to play along please add you link on their blog we are really looking forward to seeing your creation there, full instructions and links are at the bottom of this post.

It's time for me to join in the fun over at House Mouse and Friends Monday challenge where once again Woodware are joining up with our Friends at Stampendous to bring you ideas using House Mouse stamps and Dreamweaver stencils.
My card this week uses HMCM01 Fall Float. I have stamped and embossed using Vintage Sepia Versafine ink and clear embossing powder and coloured using dye based inks.
I stamped and embossed the leaves several times and fussy cut them before adding them to the card using silicon glue for added dimension.
The background to the card has been created using LG616 Leaves, stencil paste, dye based inks and gilding wax.
The sentiment from Stampendous has been die cut using a Dreamweaver die.
I never know what I am going to end up with when I first start making a card so there are often lots of left over bits and pieces.
Now as you know I am on a mission to finish them all off, so there are several extra cards this week.
I hope that you will join us again for another week of cute inspiration.

KimX (you are here)
THEME:
We’re celebrating stencils, and using them with our House-Mouse Designs® images. We’re going to bring you tons of inspiration over the next two weeks, and we can’t wait to see what you enter into the challenge! You may use ANY House-Mouse Designs® images or characters on your project, and any stencils and stenciling techniques that you like. There is never any purchase necessary to enter. And, of course, as always on the HMFMCB, “anything goes” is always an entry option.  Link your entry to the linky tool by the end of Friday, April 8, 2016.
There are prizes!! Three entries, chosen at random, will win 1-HMD Stampendous Cling Rubber Stamp, 1 – Large Dreamweaver Stencils Background Stencil, and 1 – Jar of Embossing Paste.  This contest is open to everyone!!
Even though you will be entering to win by linking up a challenge piece, we sure hope that you’ll hop around to each designer’s blog and leave a sweet “eek” of delight at their inspiration! They’ve worked hard to create something you’ll love! Please give them some love right back! Here are the links to the Sponsor’s blogs and our designers playing today: (If a blog isn’t live when you visit, they might still be sleeping! Please, check back in a few hours!)
HOW TO ENTER:
  1. Create something fun and a little bit wonderful. It’s not a talent show, winners are randomly selected. Use an HMD image plus a stencil on your work (or choose “anything goes”). It doesn’t have to be a card, it can be any kind of project. NO PURCHASE NECESSARY
  2. Post your creation online. You can post it anywhere that will give it a unique URL (internet address). Most folks have a blog, but you can post on Flickr, or PhotoBucket, or even on your Google+ account. (ps…creating a blog is free! What are you waiting for?)
  3. Get the URL for the specific post that contains your project – click on the title of your post, copy the URL from your browser’s title bar, click on the inLinkz picture on the HMFMCB post, paste your URL into the tool. Add your name and email address and voila, you’re entered!

Thanks for stopping by.
Hugs Kimx