Followers

Showing posts with label embossed resist. Show all posts

Sunday, 13 June 2021

White Embossed Resist

Evening All,

Another swelteringly hot day. I really don't cope very well in this heat. I hope that you all had a good weekend though.

Here is a card that I made for the last class to highlight the use of the Distress Oxides with resist techniques, in this case White Embossed Resist. 

The stamp is by Lisa Horton, and has been stamped and embossed in white before blending ink over the image. I spritzed the panel with plenty of water, and then let it dry naturally.
We had a wonderfully impromptu 'Non BBQ' at Becki's today, all cooked in the kitchen, hence the 'Non' bit. The kids had a whale of a time. They cope so much better than I do in this heat.
Thanks for stopping by.
Hugs Kimx

Sunday, 28 March 2021

A Little Birdie Told Me

Evening All,

Well that's the end of a very productive weekend. I have managed to finish loads of Easter cards.....43 in total!! I don't usually send them, but I thought that this year everyone needed something to make them smile.  As they are all in various stages of drying, and need to be photographed I will save them for another day and share something else instead.

This card was made a number of years ago during a trip to SirStampalot in Peterboro.
The cute birdie is from Magnolia and I have layered him onto an oval of coordinating card stock.
The stamped and embossed panel on the left has been created using Alcohol inks.
The leaf is craft metal and the flowers are fabric which I have covered in inks and embossing powder.
It finally found a home this week when I sent it to the son of one of the customers at the garage.
Time for bed now. Thanks for stopping by, I do so appreciate you visiting.
Stay safe and hugs
Kimx

Monday, 27 July 2020

Designer Boutique Baubles

Evening Everyone,
I hope you caught Suz fabulous shows on Create and Craft today featuring the wonderful Designer Boutique stamp sets.
 I think this bauble one is one of my favourites.
I have used it here on a bit of handmade background paper and then painted the baubles with watercolour Mica paints.
 This card was created using the stamping platform/Misti.
I first inked the image with brown distress oxide ink and spritzed it with water.
I stamped it on to watercolour card stock that was also sprayed with water. Once I had dried this image I stamped again with a brown Versafine Claire ink and embossed the image. Once again I painted with watercolour mica paints.
This card was made using ink sprays over an embossed image.
I had to remake the card to do a step by step tutorial for Creative Expressions, and as you can see no two cards are the same when you work with inks and dies lol.
I've got an early morning trip to the post office tomorrow with samples for Jane's next show on Friday, so I had better get to bed.
Thanks for stopping by.
Stay safe and hugs
Kimx

Sunday, 19 July 2020

How could I Resist

Hi All,
I thought that I had better post early today, before I get carried away with playtime.
So I had a look back over some of my photos from a while ago and decided on these cards made with another couple of Jane's fabulous stamp sets Solid Florals and Mini Background Greetings.
I did a bit of embossed 'resist with a twist' here.
I stamped the sentiment panel all over a piece of white card stock and left it to dry completely.
Once it was completely dry I stamped and clear embossed the leafy image several times over the sentiments and then sponged colour all over the panel. I wiped over with a soft cloth and then an anti static cloth before stamping and embossing around the edges with versamark ink and gold embossing powder.
For this card I just did one stamped image in the centre of my sentiment stamped panel.
This last card has a much more masculine feel to it and I fussy cut a gold stamped image to go over the top of my vellum sentiment strip.
Back to playing for me now.
I have a commission to finish for an old friend, and then a birthday card for a very special young lady as well as a goody box from Creative Expressions to play with. It's a hard life isn't it lol.
Stay safe and Happy Crafting.
Hugs Kimx 

Sunday, 16 February 2020

Star of Wonder

Evening everyone,
There seem to be definite advantages to living on a bit of a hill after all the rain that we have had again today.
My poor Mum's garden is still under water, in fact she joked this morning about starting work on her very own ark. Thankfully she has retained her sense of humour :O)
I don't have any water based cards that I can think of, so here are a few Christmas cards instead. Let's hope we don't get any snow or my Mum's lake will become her very own ice rink lol.
This year we have decided to devote one class every couple of months to finishing things off from our Christmas Bits Box.
I'm sure that we all have at least one of those, I know I do, although I did manage to filter out a few bits which became useful for the rest of the ladies in class.
You know the saying, 'One man's rubbish is another man's treasure', or words to that effect anyway.
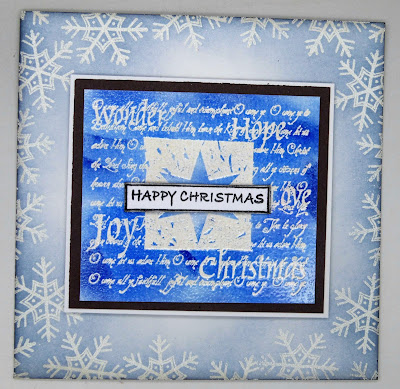
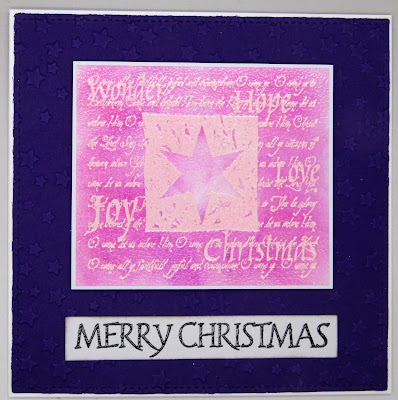
All of these cards were made with panels that I created MANY years ago during one of my numerous demos for Janice and Andy at SirStampalot.
The demo involved  dye based ink pads, white embossing powder and a lovely stamp which if memory serves was from an Australian stamp company called Stamp It.
I also used the same technique on the edge of several of the cards,
 using a variety of background stamps.
The dye based ink, once it has been blended over the white embossed image, stays wet long enough to accept clear embossing powder giving a lovely shiny panel.
I do love this technique. In fact perhaps I should add it to the class list as we haven't done it for quite a while.
Hope you have had a good weekend despite the dreadful weather, and that it clears up a bit next week. I don't think that my Mum's garden can stand many more inches of rain before she will be paddling indoors, and I certainly don't want that.
Happy Crafting and Hugs,
Kimx

Monday, 4 January 2016

Resist with a twist

Evening Everyone,
Have you had a good Monday? Things are starting to get back to normal. Lots of the schools still haven't started back yet so the roads aren't too bad in the mornings. Chaos will arrive on Wednesday, in our neck of the woods at least.
I have finally managed to get all of my newsletters in the post. My friend who puts them in the nearest pillar box for me nearly had heart failure when I handed over this rather large carrier bag full of them.
I have also managed to get a few birthday cards ready for the first half of January. See I do try to get organised, it just all goes a bit wrong round about Christmas time lol.
 These were all made using a technique that I call 'Resist with a Twist'.
The main image on all of them has been stamped and embossed over the top of a script stamp
 or even a page from an old book.
Dye based ink has then been sponged over the top to make the stamped image pop through.
 Solid images work best for this technique
as they show the script beneath.
OMG where does the time go to? I had better call it a night.
Bye for now.
Hugs Kimx

Monday, 2 November 2015

Thank You for CCM&More

Hi All
It's time for a new challenge over at CCM&More, and this time Julie is asking for you to create a Thank You card.
For my card I have used a couple of large Hero Arts stamps and a technique which I like to call 'Resist with a Twist.
First I stamped the Thank You background stamp onto white card using a black dye based ink. Make sure that this is completely dry before stamping and embossing the floral/leafy background over the top this time using versamark and clear embossing powder.
After this has been heated and cooled down sponge the entire thing with dye based ink and the clear embossed image pops through with the sentiments showing through that.
You could also use the page of an old book if you don't have a suitable script stamp.
The main sentiment is from a Woodware stamp set designed by the lovely Jane Gill.
I would just like to say Thank You for stopping by, and for leaving all of your lovely comments, I appreciate every one of them.
Nearly time to pack up for the day. I have had a great time playing in preparation for my class tomorrow evening.
Don't forget to check out the rest of the DT samples over at Crafty Cardmakers and More, there is plenty there to inspire you.
Hugs Kimx

Saturday, 7 February 2015

Playing with Tim Holtz

Hi All,
I've been playing with Tim Holtz this evening, well one of his Embossing folders at least.
Having sifted through Pinterest for some extra ideas for my Resist with a Twist class this afternoon, I also found a couple of cards using a Tim Holtz embossing folder that just inspired me to play.
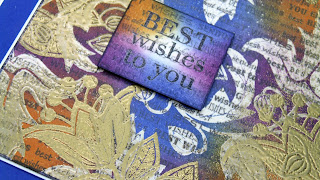
The background to this first card has been created using an Embossing folder, background paper with text on it, Versamark ink, clear embossing powder and Glimmer Mists


I guess that I really will have to do some steps for this, but as I never know what I'm going to do till I start playing, that may take some time.
This second card was created in a very similar manner, but with the addition of some Distress Inks.


I'm really pleased with how they turned out, and I think that they will make good cards for men, so I'm sure that I will be playing with this technique again.
I will just have to remember to have my camera to hand next time.
Happy Stamping and Hugs
Kimx

Sunday, 18 January 2015

Bamboo Resist with a Twist

Evening Everyone,
I hope that you have had a good weekend. Mine has been very productive.
I have very nearly finished my DT work for Hobby Art as well as finishing off all the bits and pieces from my class on Saturday.
I called it Embossed Resist with a Twist because the main Embossed Resist image (Hero Arts Bamboo stamp) has been stamped and embossed over the top of a script stamp, the 'twist' of the title.
Because the wording needs to be dry before it it stamped over I decided that it might be a lot easier for some if I used pre-printed background paper as an alternative.
After stamping and clear embossing the bamboo over the background paper I then sponged distress inks over this as well as spritzing the clean stamp with water and stamping onto the panel as well.
I also added a Hobby Art birthday greeting to the finished panel.
The blue background card has also been stamped and embossed, and I added a small panel of dry embossed card.
Although it is rather difficult to see there is also some Glimmer Mist spritzed onto it before I added the Card Candi.
We had such fun that we will be repeating the class on the 7th February for the Ladies that were unable to make it.
Can't believe it's Sunday evening already, better get some sleep if I can get my brain to shut down that is.
Hugs Kimx