Followers

Showing posts with label embossing folder. Show all posts

Tuesday, 21 February 2023

Designer Boutique Launch

Evening,
There is another fabulous new launch over at Creative Expressions. This time it is a new set of stamps launched under the Designer Boutique range.
The set I got to play with is called Fairy Blooms, and as it contains several stamp designs in the one set I decided that it would work perfectly with the Retiform technique of masking.
This involved lots of masking and ink blending along with stamping.
It is a fabulous way of using lots of stamps on one cards. I also added a couple of fussy cut flowers and leaves.
The background to the card base was created using inks, and embossing folder and some Gilding Polish.
Thanks for stopping by.
Love and Crafty Hugs
Kimx
 

Sunday, 12 February 2023

Inspired by Larainne

Afternoon All,
I spent a lovely day yesterday in the company of crafty friends. As always we talk up a storm about anything and everything. 
One of the topics under discussion was where our inspiration comes from, and as I often remind them, we get our inspiration from all around us, including each other. I have rarely taught a class where I haven't learnt something from someone there, be it a colour combo, or in the case of todays card a slightly different layout to a card.
We were playing some years ago with a Punched Window card technique, that I learnt from another crafty friend Mynette,
I made several examples for them to recreate, but this card was definitely inspired by something that Larainne made during the day. I just loved the design and asked if she would mind me pinching the idea. Thankfully she said yes.
This is another card I made using a page torn from an old book for the background.
I dry embossed the frame before adding it to the card using 3D foam tape.
This is another card that I made for the class using a shaped die to cut the central panel.
Hope you are having a great Sunday, I'm off to do a bit more crafting I think.
Thanks for stopping by.
Love and Crafty Hugs
Kimx


Wednesday, 4 January 2023

Pretty in Pink

Evening,

My Granddaughter Chloe's favourite colour is Pink, well at the moment anyway lol.

The challenge at We Love Stamping is to use 'Favourite Colours, so I thought that I would share a couple of cards that I made with Chloe in mind.

This is a Spotlight card made using pretty spring colours, an embossing folder and Woodware stamps designed by Jane Gill for Creative Expressions.
A very similar idea, just a different stamp set, once again designed by Jane.


The children all came to stay at the end of the Summer while Mummy had some training to do, and got a head start on their Christmas cards.
It is so nice now I actually have the space for them to sit and craft with me.
Thanks for stopping by, and don't forget to check out the challenge.
Love and Crafty Hugs
Kimx

Thursday, 8 December 2022

Countdown to Christmas - Day 8

Evening,

One very easy, but none the less stunning way to create a card is to use an Embossing Folder, kraft card and a white ink pad.
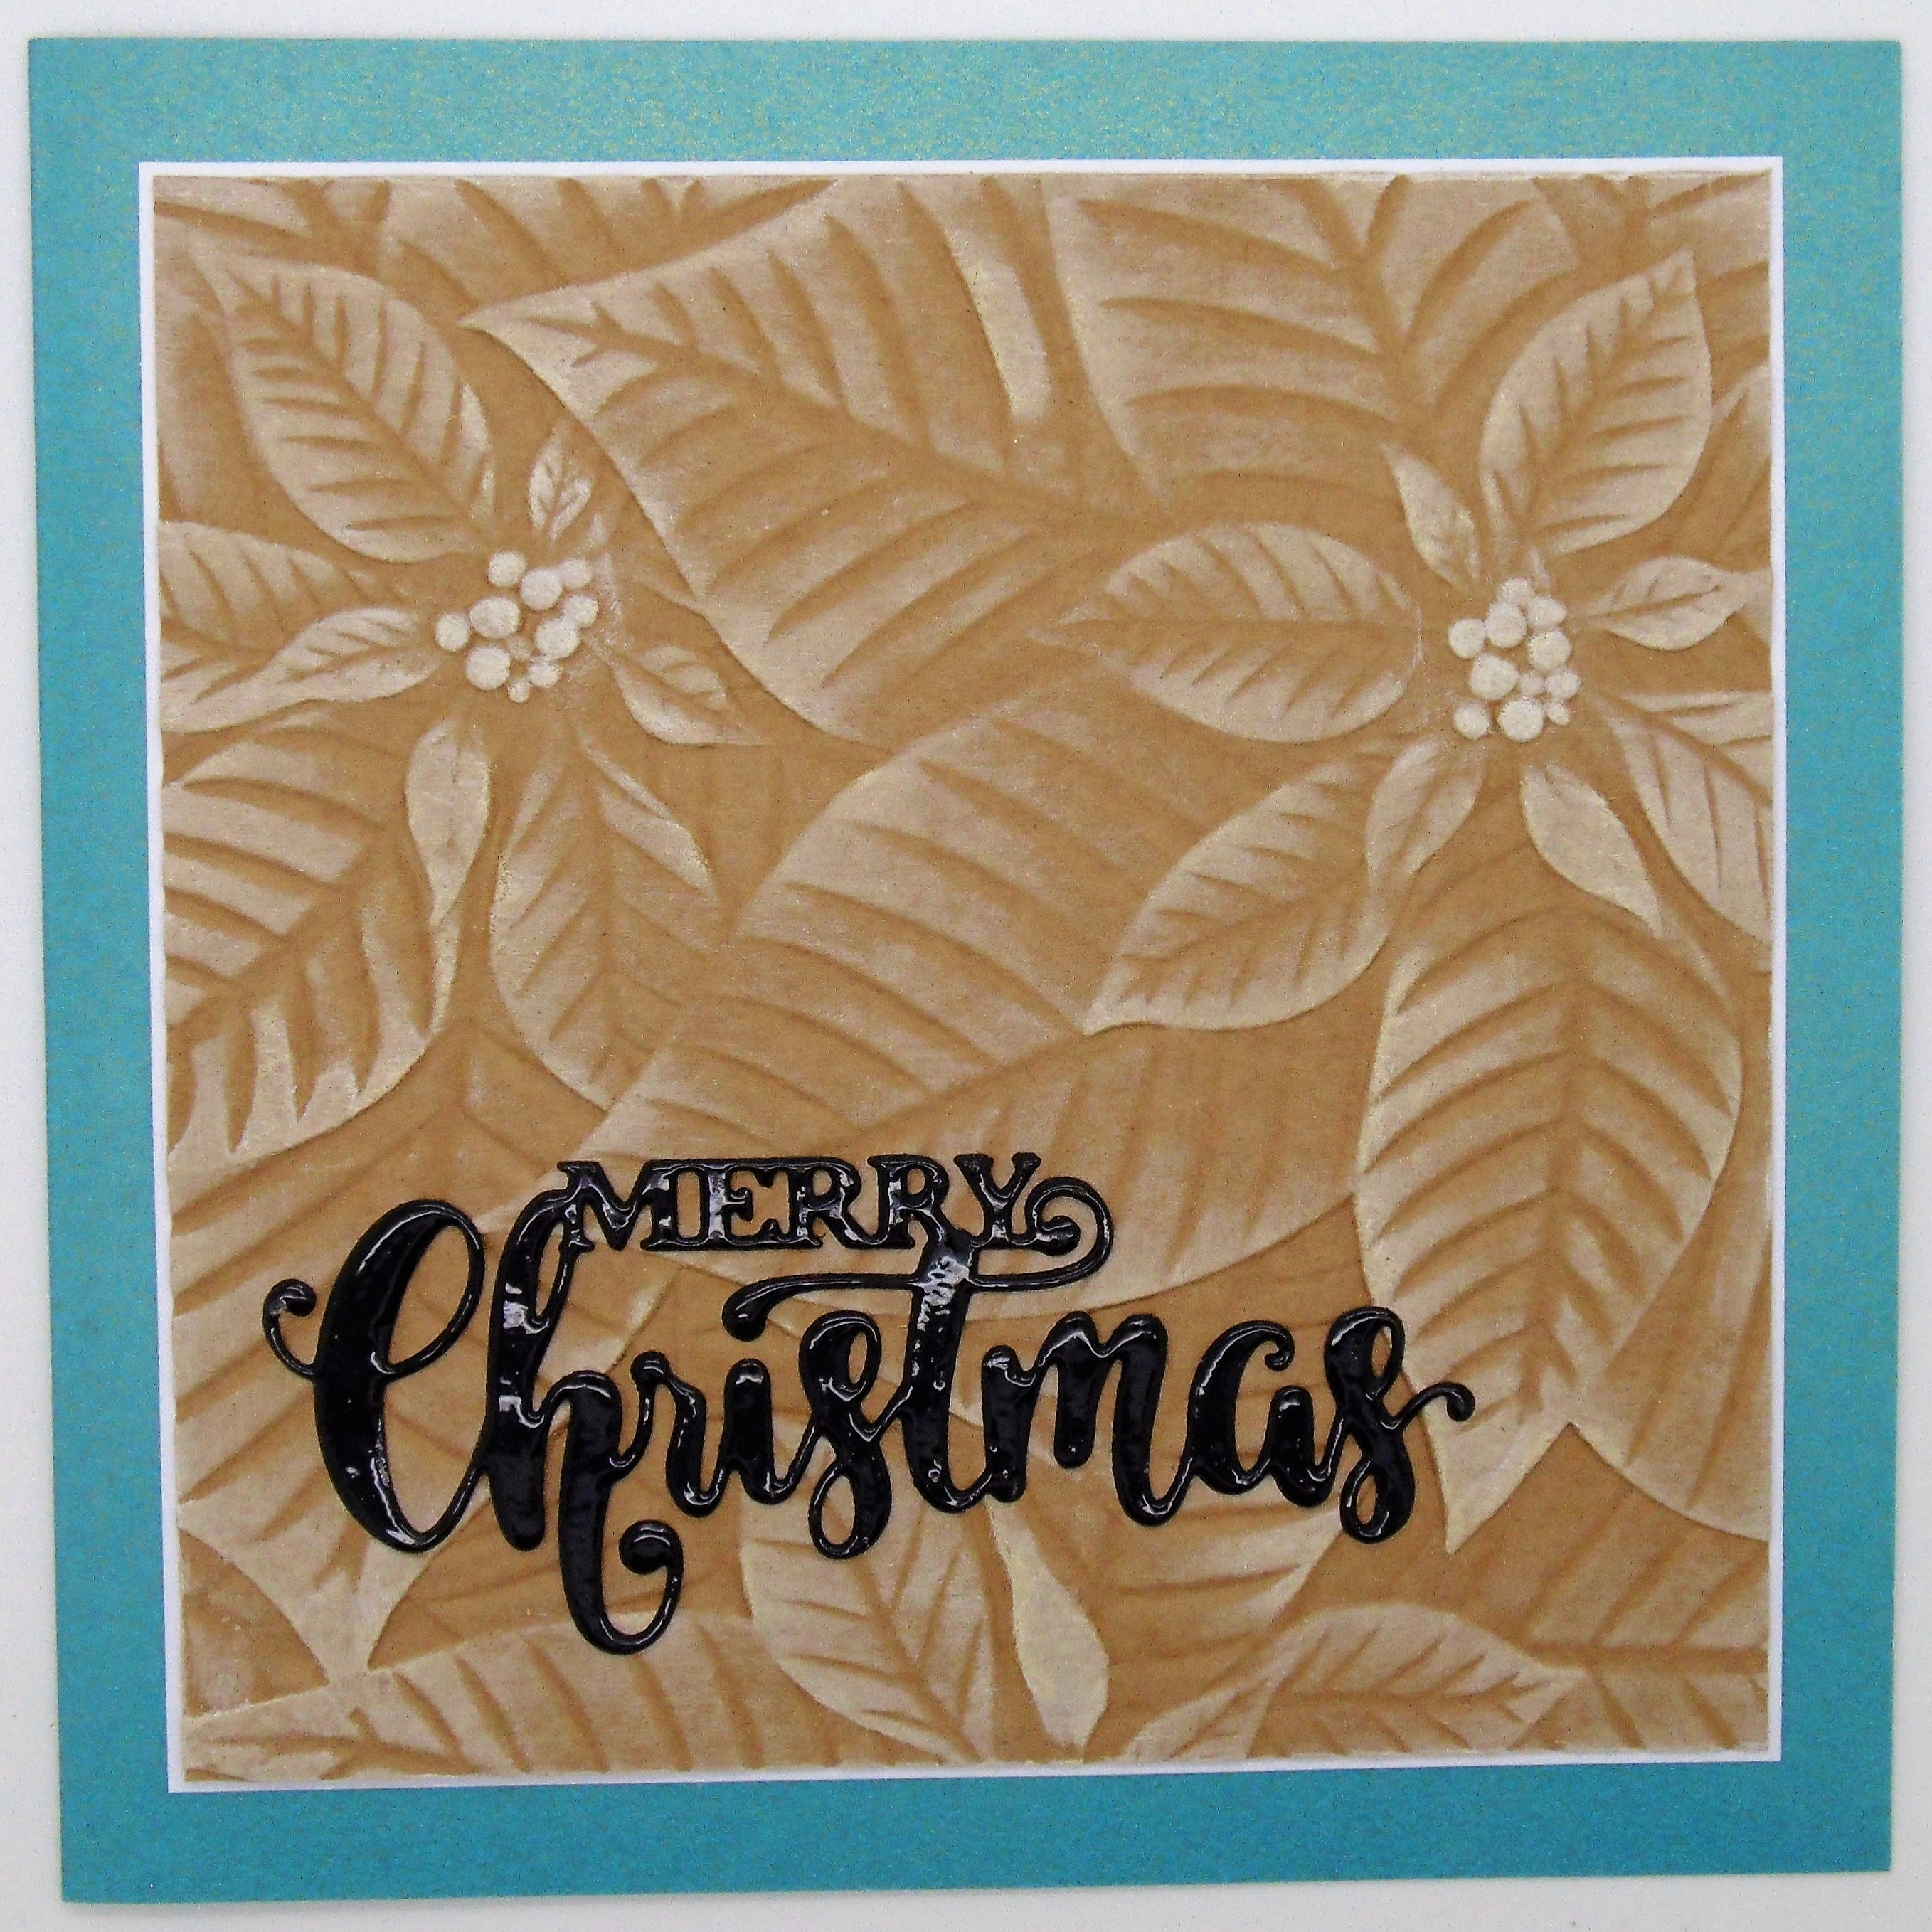
Run kraft card through an embossing machine inside an embossing folder.
The 3D ones work particularly well,
but any folder will do.
Once the card has been dry embossed, lay it flat and gently rub a white ink pad across the surface of the card. 
Mount the kraft panel on to a card base and add a sentiment......easy peasy!
The ink can be added to either side of the embossed panel
to give a totally different finish.

Thanks for stopping by.

Love and Crafty Hugs

Kimx

Wednesday, 7 December 2022

Countdown to Christmas - Day 7

Evening,

I've got some snowflakes for you tonight. I do hope that we aren't in for any, although it is definitely cold enough.

A little bit of letterpress with an embossing folder, if memory serves, and a little gilding wax.
I added a stamped and embossed sentiment,
die cut snowflake and a few well-placed gems.

Thanks for stopping by.

Love and Crafty Hugs

Kimx

Monday, 5 December 2022

Countdown to Christmas - Day 5 (Edited to add pictures)

Evening,

Having finished writing all of my Christmas cards, I have set up another production line, this time for Teachers Prezzies.

I showed my daughter a bag of sweets that I made a while ago as a Halloween gift. I thought that it might make a nice, and relatively cheap, gift to give the teachers at the school and Nursery. Little did I know that it would involve ALL of the teachers in the entire school not just the ones that the kids have in their classes!!

Never mind, I'm only too happy to be able to help, so I set up a bit of a production line with piles of all the individual bits so that the bags are quicker to put together.

No photos tonight I'm afraid as it has got too late, so I will edit the post tomorrow and add some.

Thanks for stopping by

Hugs Kimx
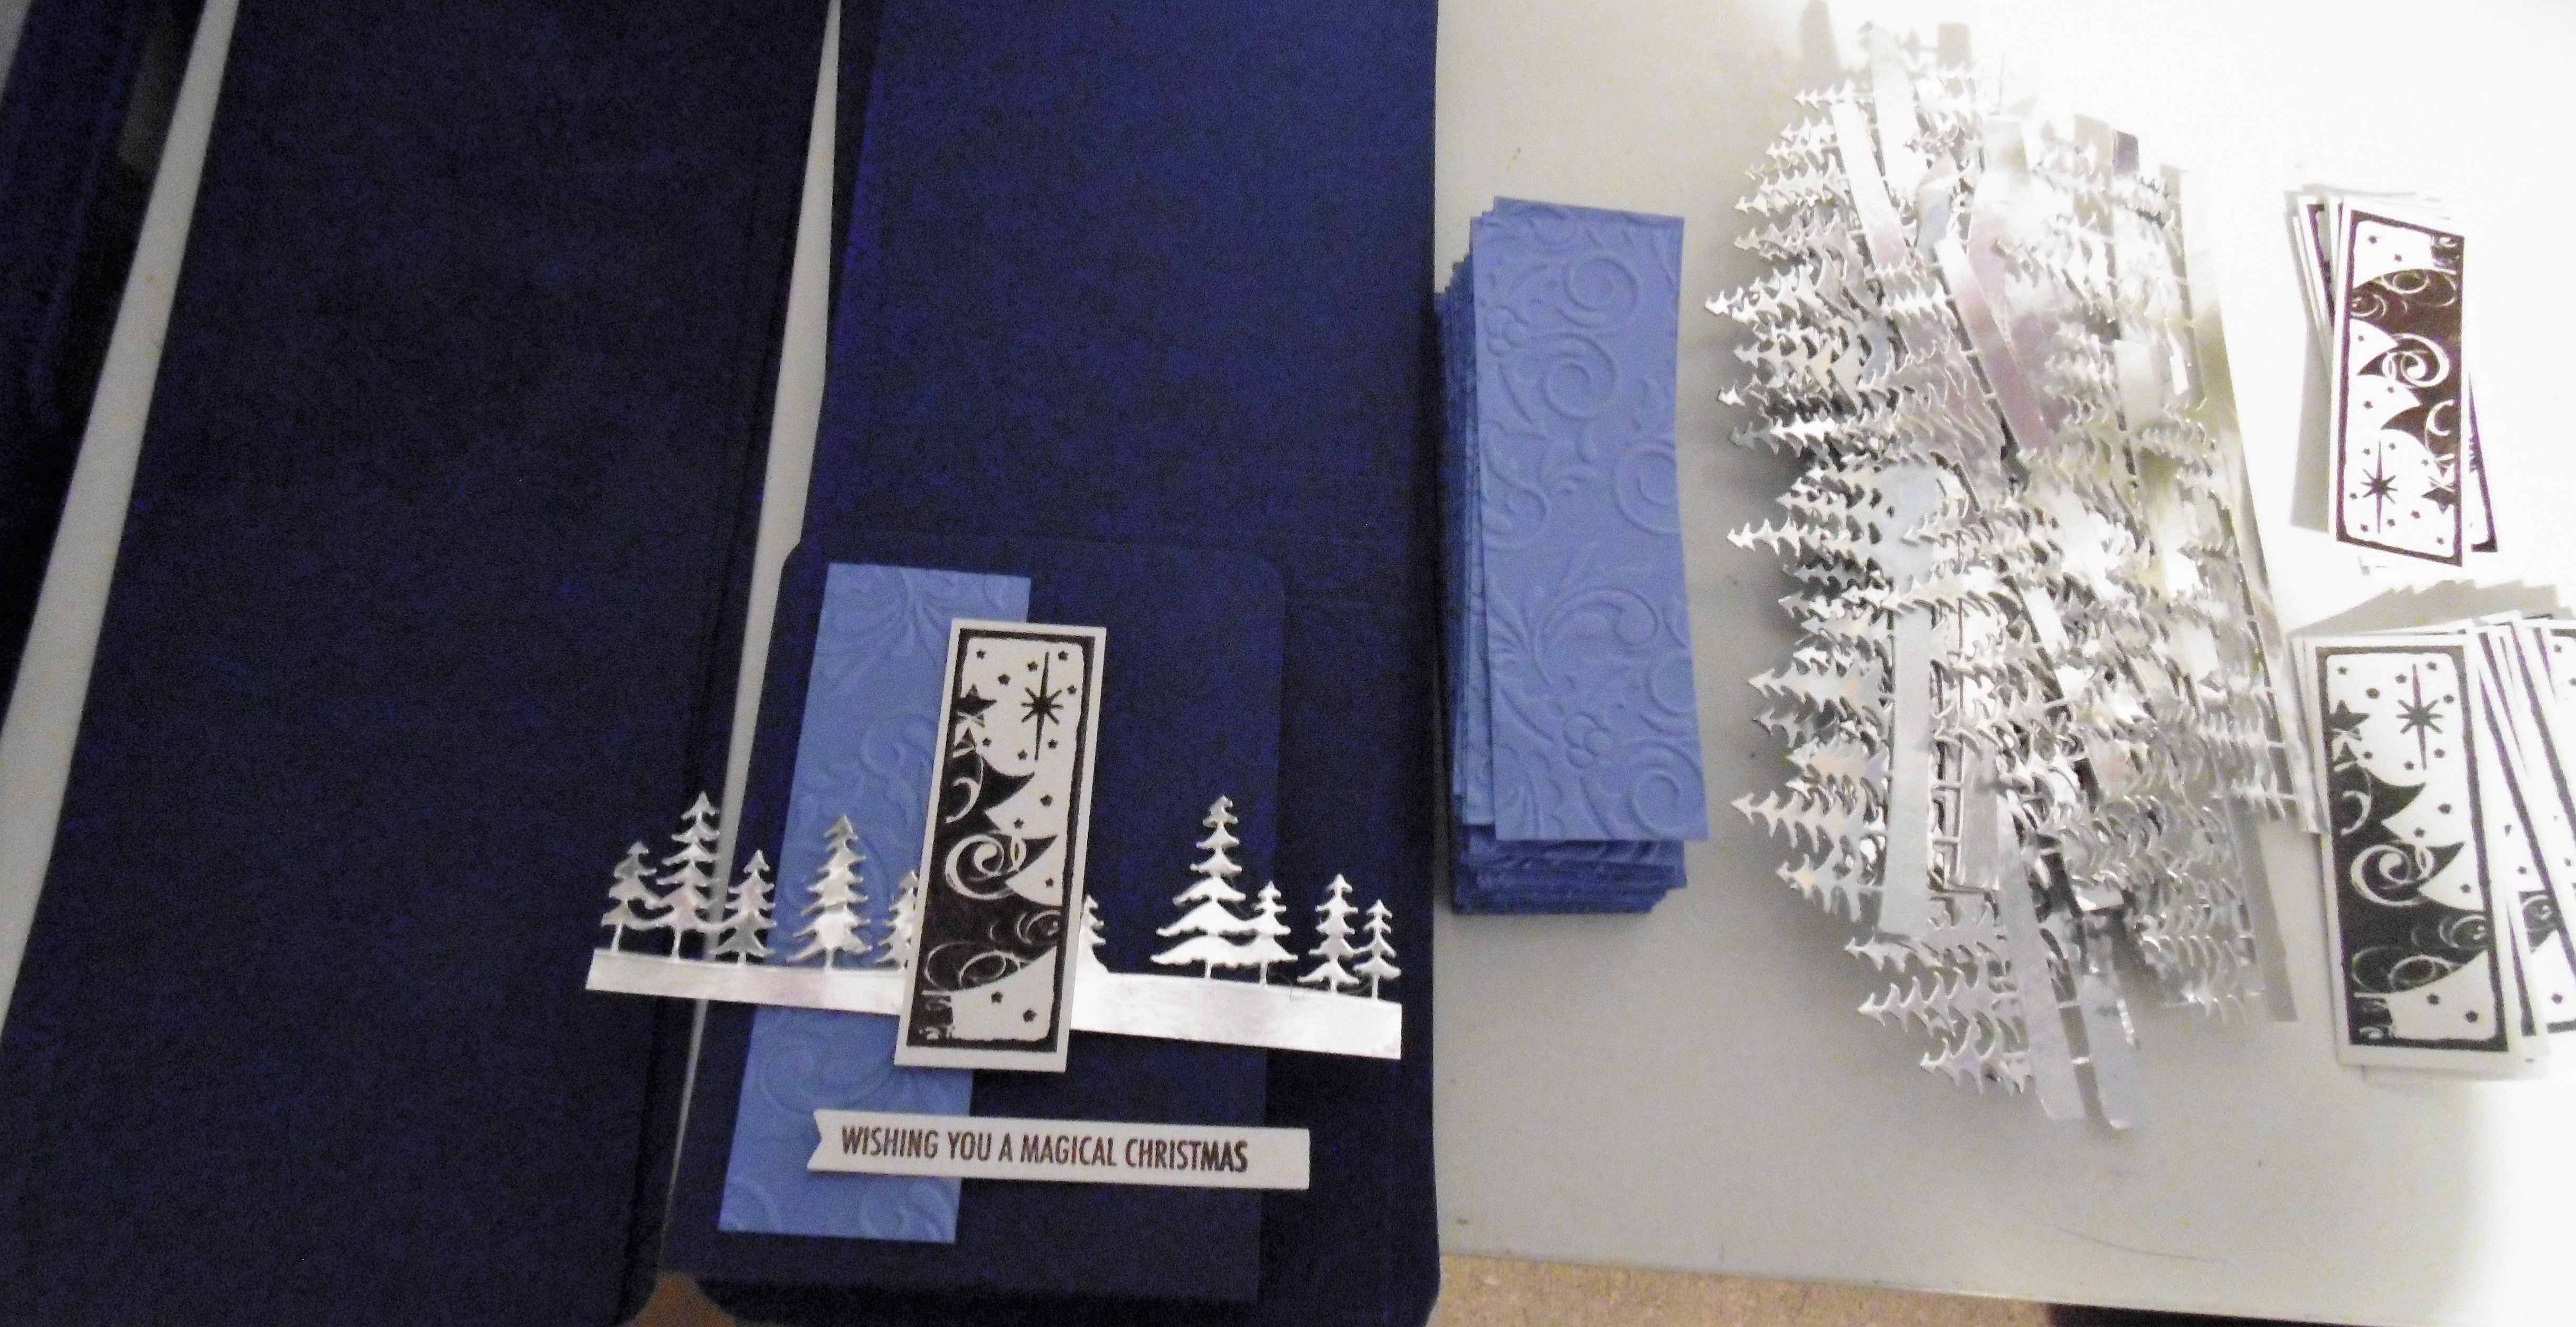
Production line.

Items used to create the Sweetie Bags
This was the original design that the Christmas sweetie bag was based on.
Finished Sweetie bags


Tuesday, 29 November 2022

Three of a Kind

Evening,

I back home safe and sound, and laptop all charged up. 

I recently had to replace the charger when the laptop slipped off the sofa and landed on the charger while it was plugged in, so I think that I might order one that I can leave with the Grandchildren for when I go to stay. I have a couple of drawers in a cupboard where I keep a set of toiletries, underwear and pyjamas to save me having to bring them with me each time, so I think that it would make sense to add a charger into the mix lol.

As I've told you before, when making samples I often have no idea of what I'm going to make. Sometimes I try out an idea or technique in several colours before deciding on which card I will send to Creative Expressions.
I coloured the ribbon with ink to match the stamping, but it was a little messy when placed at the top of the card,

so I decided to remake the card.

Of course it ended up very slightly different to the first one. I also added a strip of the embossed card over the top of the ribbon on the first card to help hide the mess.

The stamped panel on all of the cards have been created using a Misti or Stamping Platform.
Ink the stamp with Distress Inks (or similar) and spritz with water before stamping on to watercolour card stock. The colours will bleed, particularly if you lightly spritz the card stock first.

Clean the stamp, dry the cardstock, and then restamp the image using Versafine Clair ink. By leaving the stamp on the Misti/Stamping Platform in between inking, the image looks as if it has been watercoloured with minimum effort.
Of course you can always add more colour to parts of the image with a paintbrush.
Thanks for stopping by.
Love and Crafty Hugs
Kimx


Friday, 11 November 2022

Lest We Forget

Evening,

Today is Armistice Day. Each year on the 11th hour, of the 11th day, of the 11th month we remember all those that fought for us in the 'War to End All Wars' and all of the conflicts that have happened since. 

The poppy has become a symbol of respect and support for the Armed Forces, Veterans and their families, so here is a card made using one.
This uses a fabulous rub-on which I added to a piece of white cardstock, before die cutting with an oval stitched die set from Creative Expressions.
The background uses an embossing folder, distress inks and gold gilding wax.
I have worn my poppy with pride and observed todays silence at 11am............Lest We Forget.
Love and Crafty Hugs
Kimx

Friday, 4 November 2022

Wrapped Notebooks

Evening,

It's been such a long time since I blogged regularly that I now have a huge amount of projects to share with you. So here are a couple of notebooks that I made with the Girls ages ago.

I do love the Eileen Hull dies, they make the most amazing notebooks, just perfect to give as a gift.
I used the Wrapped Journal Die here.
I covered one side of the Mat Board with Sizzix Texture Roll in gold. 
I added an extra panel to the front which I had embossed using a Honeycomb Embossing Folder.
I also added some acrylic paint to give the panel a distressed look. The pages inside were cut from Kraft card
The outside of the notebook was embellished with a variety of tiny die cut flowers, 
a twiggy wreath,
and diecut letters.
I have several more of these in a box waiting to be finished off........no surprise there then lol, but I have given a couple of them away as birthday gifts.
Perhaps I will get them finished in time to give away as Christmas presents, you never know.
Thanks for stopping by.
Love and Crafty Hugs
Kimx


Saturday, 26 March 2022

Challenging the Little Grey Cells.

Evening,

Another lovely class today. It seems ages since we have crafted together since we took a week off to visit Ally Pally last time. I do think that I challenged their little grey cells though lol.

Someone had asked to do a class on Shaker cards, so I took along an assortment of dies to use as the main image, including some of the new Sue Wilson Panel dies.

I didn't get to finish anything in class, so here is a card that I made a while ago for Janice and Andy at SirStampalot.
I used an assortment of dies
and a piece of mop up background for the base card. 
You can pop anything into the card for the shaker element including glitter and the tiny bits that drop out of the dies when cutting them.

The class was a great way to use up some of the numerous sequins that I seem to have acquired over the years. I took along a box full of glitter and dies that would cut out tiny pieces as the shaker element.

I took some samples that I have already shared with you HERE which gave the Girls something to copy while they got the hang of things. 

As usual I have loads of ideas for cards rolling around in my head, just no time to put them in to practice. I will at least try and finish off the one that I started in class, because I then have a DT box to attend to, and classes to plan for my trip to SirStampalot in the very near future.

Enjoy the rest of your weekend.

Hugs Kimx