Followers

Showing posts with label dreamweaver. Show all posts

Monday, 4 April 2016

House Mouse/Dreamweaver - with Stampendous and Woodware week 2


Morning Everyone,
I am taking part in a bloghop  over the next two weeks we are going around the world with our friends at Stampendous.
STM_HMFC215hop_banner4
For almost 3 years now Stampendous have had the license to distribute the stamps of House-Mouse Designs® there are now over 200 high quality  rubber stamps in the range, not only the mice, but also HappyHoppers and Gruffies. To celebrate this The House-Mouse and Friends Monday Challenge Blog is happy to be hosting a unique challenge for everyone for the next two weeks. The HMFMCB Design Team is teaming up with the Stampendous Design Team, The Stencil Specialists (distributors of Stampendous and Dreamweaver Stencils in Australia) plus us Woodware Craft Collection Blog Design Team (distributors of Stampendous and Dreamweaver Stencils in the UK) for a huge Blog Challenge.
To make it extra special we will be using not only the cuddly creatures but combining them with the wonderful Dreamweaver Stencils which are also part of the Stampendous stable. 
We have prizes so would love you to join in with us as we hop around the world for 2 whole weeks, REMEMBER the hosts are House-Mouse and Friends and they are a challenge blog so to play along please add you link on their blog we are really looking forward to seeing your creation there, full instructions and links are at the bottom of this post.

It's time for me to join in the fun over at House Mouse and Friends Monday challenge where once again Woodware are joining up with our Friends at Stampendous to bring you ideas using House Mouse stamps and Dreamweaver stencils.
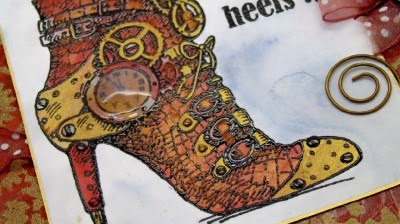
My card this week uses HMCM01 Fall Float. I have stamped and embossed using Vintage Sepia Versafine ink and clear embossing powder and coloured using dye based inks.
I stamped and embossed the leaves several times and fussy cut them before adding them to the card using silicon glue for added dimension.
The background to the card has been created using LG616 Leaves, stencil paste, dye based inks and gilding wax.
The sentiment from Stampendous has been die cut using a Dreamweaver die.
I never know what I am going to end up with when I first start making a card so there are often lots of left over bits and pieces.
Now as you know I am on a mission to finish them all off, so there are several extra cards this week.
I hope that you will join us again for another week of cute inspiration.

KimX (you are here)
THEME:
We’re celebrating stencils, and using them with our House-Mouse Designs® images. We’re going to bring you tons of inspiration over the next two weeks, and we can’t wait to see what you enter into the challenge! You may use ANY House-Mouse Designs® images or characters on your project, and any stencils and stenciling techniques that you like. There is never any purchase necessary to enter. And, of course, as always on the HMFMCB, “anything goes” is always an entry option.  Link your entry to the linky tool by the end of Friday, April 8, 2016.
There are prizes!! Three entries, chosen at random, will win 1-HMD Stampendous Cling Rubber Stamp, 1 – Large Dreamweaver Stencils Background Stencil, and 1 – Jar of Embossing Paste.  This contest is open to everyone!!
Even though you will be entering to win by linking up a challenge piece, we sure hope that you’ll hop around to each designer’s blog and leave a sweet “eek” of delight at their inspiration! They’ve worked hard to create something you’ll love! Please give them some love right back! Here are the links to the Sponsor’s blogs and our designers playing today: (If a blog isn’t live when you visit, they might still be sleeping! Please, check back in a few hours!)
HOW TO ENTER:
  1. Create something fun and a little bit wonderful. It’s not a talent show, winners are randomly selected. Use an HMD image plus a stencil on your work (or choose “anything goes”). It doesn’t have to be a card, it can be any kind of project. NO PURCHASE NECESSARY
  2. Post your creation online. You can post it anywhere that will give it a unique URL (internet address). Most folks have a blog, but you can post on Flickr, or PhotoBucket, or even on your Google+ account. (ps…creating a blog is free! What are you waiting for?)
  3. Get the URL for the specific post that contains your project – click on the title of your post, copy the URL from your browser’s title bar, click on the inLinkz picture on the HMFMCB post, paste your URL into the tool. Add your name and email address and voila, you’re entered!

Thanks for stopping by.
Hugs Kimx


Tuesday, 29 March 2016

House Mouse/Dreamweaver - with Stampendous and Woodware


Good Morning,
I am taking part in a bloghop  over the next two weeks we are going around the world with our friends at Stampendous.
STM_HMFC215hop_banner4
For almost 3 years now Stampendous have had the license to distribute the stamps of House-Mouse Designs® there are now over 200 high quality  rubber stamps in the range, not only the mice, but also HappyHoppers and Gruffies. To celebrate this The House-Mouse and Friends Monday Challenge Blog is happy to be hosting a unique challenge for everyone for the next two weeks. The HMFMCB Design Team is teaming up with the Stampendous Design Team, The Stencil Specialists (distributors of Stampendous and Dreamweaver Stencils in Australia) plus us Woodware Craft Collection Blog Design Team (distributors of Stampendous and Dreamweaver Stencils in the UK) for a huge Blog Challenge.
To make it extra special we will be using not only the cuddly creatures but combining them with the wonderful Dreamweaver Stencils which are also part of the Stampendous stable. 
We have prizes so would love you to join in with us as we hop around the world for 2 whole weeks, REMEMBER the hosts are House-Mouse and Friends and they are a challenge blog so to play along please add you link on their blog we are really looking forward to seeing your creation there, full instructions and links are at the bottom of this post.

It is my turn to post over at Woodware today where we are joining in with a bloghop over at House Mouse and Friends Monday Challenge.
The challenge this week is to use Dreamweaver Stencils in combination with House Mouse stamps.
I chose the adorable HMCR57 Thistle Nap as my main image, stamped and embossed using Vintage Sepia Versamark ink and clear embossing powder.
I coloured it in using dye based inks and added glitter glue to the thistle down and faux stitching to the edge of the circular die cut panel.
I chose LJ816 Spider Web as my Dreamweaver stencil which I dry embossed using my Cuttlebug and then coloured using dye based inks.
I also added a little glitter glue and some gilding wax.
As usual I got a little bit carried away and made a second card using the same stamp and LX7026 Chevron Background Stencil.

I hope that you will join us this week, and next for what I am sure will be an inspirational fortnight of cute cards.

KimX (you are here)
THEME:
We’re celebrating stencils, and using them with our House-Mouse Designs® images. We’re going to bring you tons of inspiration over the next two weeks, and we can’t wait to see what you enter into the challenge! You may use ANY House-Mouse Designs® images or characters on your project, and any stencils and stenciling techniques that you like. There is never any purchase necessary to enter. And, of course, as always on the HMFMCB, “anything goes” is always an entry option.  Link your entry to the linky tool by the end of Friday, April 8, 2016.
There are prizes!! Three entries, chosen at random, will win 1-HMD Stampendous Cling Rubber Stamp, 1 – Large Dreamweaver Stencils Background Stencil, and 1 – Jar of Embossing Paste.  This contest is open to everyone!!
Even though you will be entering to win by linking up a challenge piece, we sure hope that you’ll hop around to each designer’s blog and leave a sweet “eek” of delight at their inspiration! They’ve worked hard to create something you’ll love! Please give them some love right back! Here are the links to the Sponsor’s blogs and our designers playing today: (If a blog isn’t live when you visit, they might still be sleeping! Please, check back in a few hours!)
HOW TO ENTER:
  1. Create something fun and a little bit wonderful. It’s not a talent show, winners are randomly selected. Use an HMD image plus a stencil on your work (or choose “anything goes”). It doesn’t have to be a card, it can be any kind of project. NO PURCHASE NECESSARY
  2. Post your creation online. You can post it anywhere that will give it a unique URL (internet address). Most folks have a blog, but you can post on Flickr, or PhotoBucket, or even on your Google+ account. (ps…creating a blog is free! What are you waiting for?)
  3. Get the URL for the specific post that contains your project – click on the title of your post, copy the URL from your browser’s title bar, click on the inLinkz picture on the HMFMCB post, paste your URL into the tool. Add your name and email address and voila, you’re entered!

Thanks for stopping by.
Hugs Kimx


Sunday, 29 March 2015

Click your Heels Dorothy

Evening Everyone.
Another fabulous class at Davina's today, very quite though, they were all colouring in.
I took along an assortment of stamps including this fabulous shoe from Stampendous. How I wish I could still wear something like this, it is awesome.
I spent many years walking everywhere in 4inch heels. Backwards and forwards to the school three or four times a day with the children, most of the time pushing either a double buggy or a wheelchair. And now I can't even manage court shoes for more than an hour. The joys of getting older lol.
I coloured the image with a combination of Watercolour Pearlex and some red ink. I also added some glossy accents which I was too impatient to let dry before I took these pictures :O)
I sorted through my stash of bits to find some things that would go with the 'Steampunk' feel of the card and these were the best I could do.
The background has been made using a Dreamweaver Stencil, Gold Brilliance ink and some Gold Embossing Powder.
I also sponged the panel with Distress inks and then spritzed over it with a couple of Glimmer Mists. I covered the whole panel with scrunched up cling film and left it to dry which gave added texture to the background.
It is a shame that I didn't get to finish this earlier in the week as it would have been an ideal advertisement for the fabulous Making Texture Collaboration blog hop that has been going on between Stampendous/Woodware/Dreamweaver.
So many fabulous ideas using items produced by three fabulous companies.
Don't forget to change your clocks.
One hour less sleep tonight, now that is definitely something I could do without.
Still I suppose it shows that Spring is finally with us.
Get a good nights sleep. See you again tomorrow.
Hugs Kimx

Friday, 7 November 2014

Christmas Collage at Woodware

Hi All
I'm hoping that Blogger has been kind this morning and that this post has gone through as scheduled.
I am filling in for the lovely Siobhan for a couple of weeks so that she can have some time off.
The challenge at Woodware this week is Christmas Collage so I consulted Google for a definition, and this is what I came up with.
  • A composition of miscellaneous materials and objects
  • An assemblage of diverse elements

 
I have been playing with some of the fabby new Embossing Folders from Dreamweaver that arrived for me while I have been at SirStampalot.
I can't believe that when you are reading this I will be on the last day of my 'holiday', boo hoo. It goes far too quickly. Still March isn't that far away I suppose, which is when I will be back.
I sponged a piece of cardstock with some dye based inks (red, brown and green) before dry embossing it with FJ922 Christmas Borders one of the Dreamweaver Embossing Folders.
Then I used the same brown dye based ink pad to go all over the image using the inkpad directly on to the cardstock.
By keeping the inkpad flat and using a swirling motion the ink hits the 'highs' of the embossed image which then highlights the nice pattern.
Some of my favourite embellishments at the moment are the Metallic Wax Pastes which I add with a 3/8 inch  stencil brush because I can get the wax out of the pot because of my finger nails!!
The gold shows up much better here.
I used one of the sentiments from JGS353  Festive Verse cut out with a circle die and lightly inked using the same colours.
The flourish, ribbon and pin are also from my new box of toys.
The Dreamweaver Embellishment pin has been coloured with an alcohol based marker and the flourish has been cut from brown card using DM2001 Petite Fern.
The Distressed Cotton Ribbon is also from Woodware and comes in several colours and widths.
I hope that you like my card, and join the rest of the Gang for their take on Collage Christmas.
Have a great day, and Happy Crafting.
Hugs Kimx

Tuesday, 8 July 2014

Under the Sea with Crafty Cardmakers and More

Hi All
I know, this should have gone live yesterday, but you know how rubbish I am with blogging at the moment so I hope that I will be forgiven :O)
Julie is hosting the challenge this time over at Crafty Cardmakers and More, and she has chosen 'Under the Sea' for her theme. She would like you to create something with Mermaids, Turtles, Fish or other dwellers beneath the waves.
 I chose a lovely Woodware stamp set called Sea Life for the main focus of my card.
I stamped and embossed the three images onto Watercolour card and coloured them using Distress inks and what I call the 'Wet Watercolour technique'.
The background paper has been made using my Creative Palette, bubble wrap and inks.
I added some glossy accents to the stamped images and used some medical gauze under the main panel.
The 'coral' has been made from a piece of acetate (packaging from a newly acquired embossing folder) which I die cut using the fabulous Dreamweaver Leafless Tree. I added a little colour to it using Stazon ink.
The seaweed along the bottom of the panel is a Magnolia stamp that I bought a while ago during one of my 'holiday' visits to Sirstampalot who are one of our fabulous sponsors for this challenge.
Of course I always throw away the packaging so I can't find the code number for it, but Janice and Andy are very good and I 'm sure that they will probably know the number without even looking. Or you could always refer them to my blog for a picture if all else fails.
I had a narrow panel of background paper left over so I decorated the envelope.
Better post this now before another day passes me by. Please don't forget to check out the challenge HERE and show the rest of the team some love.
Night night.
Hugs Kimx

Thursday, 29 May 2014

A New Home at Woodware

Good Morning
They have a New Home challenge over at Woodware this week, so I have taken time out from my other sample making to create this card.
My Sister and her Husband are currently renovating an old barn in France which will become their new home, and so this stamp made me think of them when I was looking for an idea.
I stamped and embossed the image FRS244 Country Fields onto watercolour card and painted it using Watercolour Pearlex.
'A New Home' is a small stamp from an old favourite of mine FRCL165 Winding Paths.
I used a Dreamweaver stencil LJ910 Rolling Hills and my E-bosser to create the panel on the left hand side of the card. I thought that it mirrored the hills on the stamped panel.
I added some tiny gems to the flower centres.
The ribbon down the center of the card hides the edge of the stencil.
As it will be a while before my sister's house is any where near finished and lived in, I think that I will send this card to a friend who moved home last week. After all now I have the idea it will be easy to recreate.
Have a great day.
hugs Kimx

Sunday, 27 April 2014

My kind of Alcohol

Hi All
I hope that you are having a wonderful weekend.
We had a fabulous class yesterday at Davina's playing with Alcohol inks. As a non drinker this is definitely my kind of alcohol, and we had so much fun playing with it. There was also cake and Easter Eggs, what more could a girl ask for!!
Because it has been such a long time since I have played with Alcohol Inks (I used the ones by Dreamweaver available from Woodware) I checked out Pinterest and Youtube for some ideas.
As you can see I ended up with loads of bit (this is just a small selection) which need finishing off.
As usual we made a tag which shows the inks used as a background on glossy card stock.
In fact there were so many techniques to share that we ended up making two. This second one shows inks used on acetate which I found HERE (about 5mins into the clip)
I'm off to do a bit of finishing off so I might try and pop back later with some more finished samples, it just depends on how much fun I'm having and whether I can stop before bed time :O).
Hugs Kimx

Friday, 13 December 2013

A sketch challenge for Woodware

Evening Everyone
This week at Woodware the Girls have been inspiring us following a sketch, so I felt that it was about time I joined in again.
In fact I actually got a little bit carried away and made two cards.
The first uses Jane's lovely December 25th stamp which works so well with the Wet Watercolour technique and the Pearlex Palettes.
I painted the embossed image using this technique and then cut it out and mounted it onto kraft card.
The panel on the right hand side has been dry embossed using a Dreamweaver stencil, and then with the stencil still in place I added Versamark ink and finally Frantage Embossing powder.
The second card uses the same stamped, embossed and coloured image this time mounted onto blue card stock.
The panel on the left hand side (I rotated the sketch) has been created by adding Versamark ink to an embossing folder before running it through my Cuttlebug.
Once dry embossed I added powdered Pearlex which sticks to the Versamark ink.
For the finishing touch I added some Glossy Accents to the berries.
This has to be one of my favourite of Jane's Christmas designs. I hope she likes what I have done with it.
I would also like to enter this into the challenge at the Friday Mashup where they are asking for you to 

  1. Create a "Winter themed project (Non Christmas)."
  2. Create a project using "Embossing (Dry or Heat). "
  3. Or Mash it Up and create a "Winter Project using Embossing."

Have a great weekend.
hugs Kimx

Sunday, 1 December 2013

There's a mouse in the house.

Evening All
I have finally finished all of the DT cards that I have been working on over that last couple of weeks. A quick trip to the post office tomorrow after work and they will be someone else's problem.
 My card tonight was made a little while ago using one of the Stampendous House Mouse stamps.
The coloured image has been mounted on to one of the Base-it's cards supplied by Woodware.
I used a couple of Dreamweaver stencils and a stamp to add some extra background.
I also added some Frantage powder and punched snowflakes.
I suppose I ought to start writing some of these Christmas cards instead of just making them lol.
Thanks for stopping by
hugs Kimx