Followers

Showing posts with label airless misters. Show all posts

Thursday, 29 April 2021

Papercuts Jasmine and Mop Up

Evening,

A couple of cards tonight created using the Jasmine Papercuts Edger die.

I die cut Jasmine in both black and white card and then layered them on top of one another to create a slight drop shadow.
The inky background that the die cut is layered onto is a piece of mop up background from my stash.
I spritzed the main blue card with the Rose Pearl Airless Mister to add some shimmer.
This card was created using many of the same elements as the first card only this time I die cut the Jasmine from the mop up background card and then layered it on to black.
I added some faux stitching, some tiny gems and a sentiment.
I do hope that the weather starts to warm up if we are going to have to continue to meet up outside. I went for a walk this afternoon and then dropped in on Davina for a coffee, sat outside in the garden of course. It was lovely to catch up, but we were shivering by the time we had finished lol.
Thanks for stopping by, it's nearly the weekend thank goodness.
Stay safe and hugs
Kimx

Saturday, 27 February 2021

Designer Boutique Dragonfly Delight Steps

Evening Everyone,

I hope that you have had a good day. I have had a very successful one finishing off a load of bits and pieces. For now I'm sharing a card that I made for Creative Expressions, using one of the fabulous new stamps from Designer Boutique which have just launched.

I helped them out with some steps for this card, so I thought that I would share them with you here.

You will need:

Creative Expressions Designer Boutique Dragonfly Delight UMSDB045

Creative Expressions Sue Wilson Noble Double Pierced Ovals CED5516

Cosmic Shimmer Airless Mister Amber Lights CSAMLIGHT

Cosmic Shimmer Airless Mister Flirty Pink CSAMPINK

Cosmic Shimmer Airless Mister Poppy Parade CSAMPOPPY

Cosmic Shimmer Airless Mister Blackberry Bliss CSAMBLISS

Creative Expressions Foundations Card Coconut White 40980

Cosmic Shimmer Detail Embossing Powder Black CSDEPBLK

Ranger Perfect Medium PERPADCL

Creative Expressions Mounting Foam CEMOUNT

Cosmic Shimmer Dries Clear Glue CSGLUE

Hole punch

Anti static bag

Ruler

Black pen such as a Sakura Pigma Micron pen

Cling film

Thin undiluted bleach

Step by Step Instructions

Step 1: Cut in half 1 sheet of coconut white card A4 and score one piece in half to create the card blank

Step 2: Take the other piece of coconut white card and spray it with airless misters. Once finished, add cling film to the surface and leave it to dry for several hours/overnight. Remove the cling film once dry.

Step 3: Wipe your card front with an anti-static bag and stamp the dragonfly stamp using perfect medium ink pad.

Step 4: Cover the stamped image with black embossing powder and heat emboss

Step 5: Repeat steps 3&4 on the pre-coloured sheet you created using airless misters.

Step 6: Using Double Pierced Oval die of a chosen size, die cut section of the dragonfly from your pre-coloured sheet and glue it over the same pre-stamped design on your card blank, so that both images match.

Step 7: Use a small amount of bleach and a fine blush to lift some colour out of the flowers and wings of the dragonfly.

Step 8: Draw a decorative border using a ruler around the design, avoiding going over the stamped image

Step 9: Hole punch selected areas of the design left on the pre-coloured sheet. Shape them on a foam pad/mouse mat using a shaping tool. Use foam tape or mounting cushion cut to the size to adhere the domed circles to the card on opposite sides of the dragonfly.


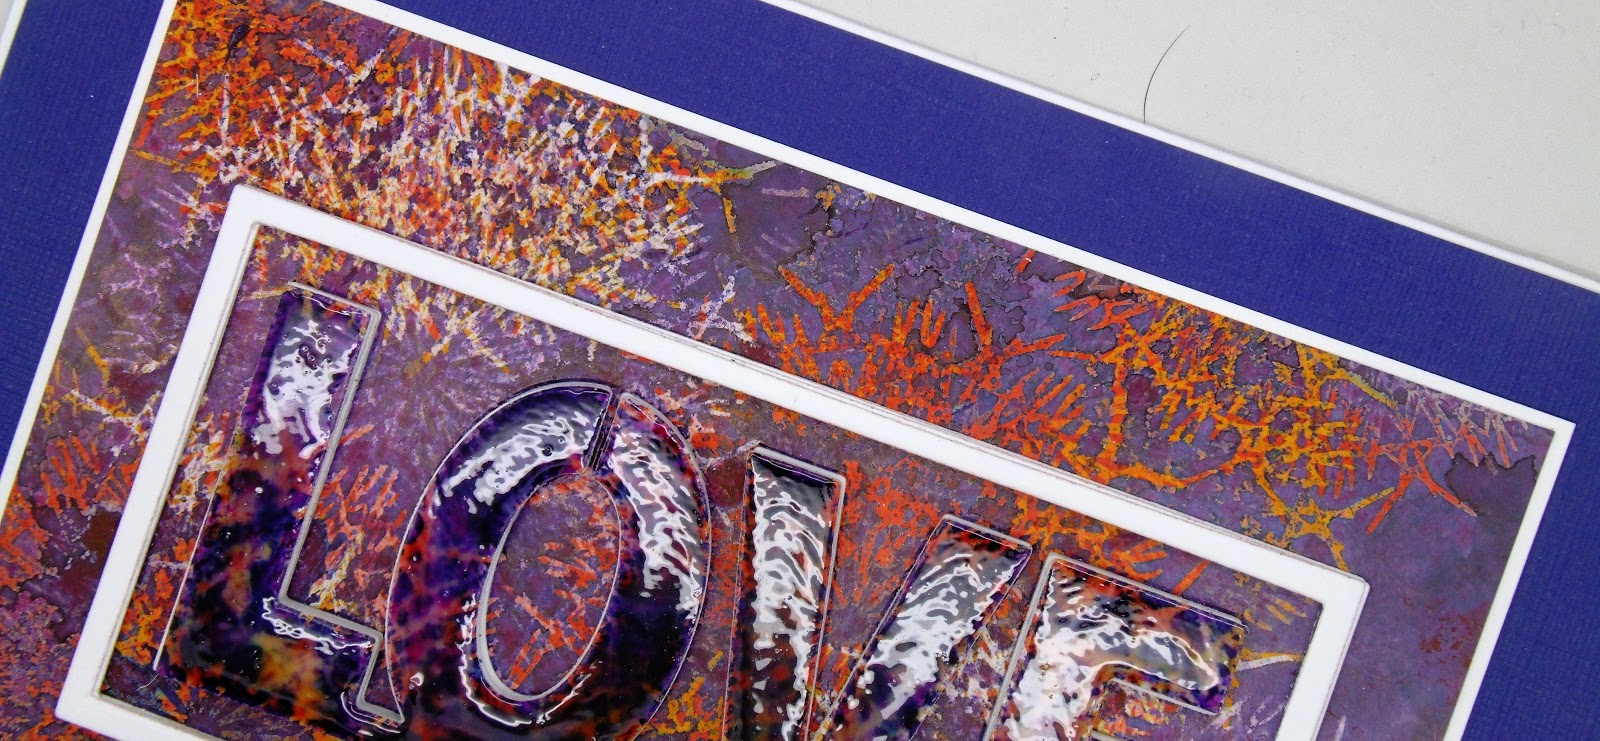
I do love to make inky backgrounds and the airless misters are fabulous for this.
I used scrunched up cling film over the wet inks which leaves a lovely frosty pattern in it.

They also react beautifully with bleach which is what I used to paint the daffodils and dragonfly.

Thanks for stopping by, and I hope that you find the instructions useful.

Hugs Kimx

Tuesday, 16 February 2021

Jane on the Box

 Morning All

Jane is on the TV today with two shows featuring her fabulous new stamp designs, and there are some real beauties amongst them.

Here are a couple of cards made using one of her beautiful designs JGS756 Scented Blooms.
I used Airless Misters and Watercolour Inks to create a piece of background on to which I stamped and embossed the floral image and then did a bit of extra colouring and fussy cutting.
This card was created in the same way on a piece of mop up background.
A bit of fussy cutting around part of the image as well as a hand drawn border.
Several of the larger floral designs have a single matching flower to co-ordinate with them.
So that is what I have used here along with a die cut background panel.
Jane's shows are at 10.30am and 4.30pm on Create and Craft so don't forget to set up your recorders.
Looking forward to watching.
Hugs Kimx


Saturday, 3 October 2020

Celebrate.....World Cardmaking Day

 Evening,

I hope that you have been celebrating World Cardmaking Day in a suitable manner lol. I have been making samples all evening, and will continue again tomorrow.

So here is a card to Celebrate.
I used some Airless Misters to add colour to a sheet of watercolour card,
and then I ran the panel through an embossing machine with an Andy Skinner stencil on it and a baby wipe to remove some of the ink. I also added some gilding polish to help it stand out even more.
I got the technique from a blog post by Jennifer McGuire. Celebrate was cut from several layers of black card stock and then stacked together with glue. I added glossy accents to the finished sentiment for added dimension.
I added some black Dazzlers to the corners.
Thanks for stopping by.
Hugs Kimx

Monday, 29 June 2020

Create Your Own Background for CCM

Evening Everyone,
We have a new challenge starting today over at CCM and it is the last one before our summer break.
Jackie is our host and she is looking for you to 'Create Your Own Backgrounds'
Now I have to say that this challenge is right up my street. I LOVE making them. This one uses an old multilayering resist technique.
I remember demonstrating this technique at my very first show in London.
I was on a stand for Crafts Beautiful magazine in which I had had an article published that particular month.
As it was the October edition I went for something with an autumnal feel. I do remember that they weren't keen on the black card base that I had chosen for the cards. They liked white, but the panels didn't look as good on it so I was a bit of a rebel and stood my ground.
I remember being incredibly nervous when the doors opened, but thoroughly enjoying the experience. There was such a buzz and loads of friendly people all eager to learn.
For my cards today I have used an Andy Skinner stamp and some Airless Mister sprays.
For my colour combo first stamp onto a piece of glossy card using a Versamark or Perfect Medium inkpad.
Next spray the card with Amber Lights Airless Mister. I usually use dye based ink pads for this technique, so I thought that I would give it a go with some ink sprays for a change.
They certainly make it easy to coat your card in colour. Once the ink has dried stamp again using your stamp and inkpad and then spray with colour.
Try and stamp into the spaces between the designs as well as overlapping parts of the image. This layer was a combination of Flirty Pink and Cherry Pop.
Continue with this layering process using a darker colour each time. Here I used a combination of Maya Blue, Blackberry Bliss and Night Reflection.
Provided that you continue to overlap your stamped images each different layer of colour will show through.
I trimmed my panel down and used one of the fabulous paper cut dies over it.
I cut the die in black and white to create a slight shadow.
On this panel I have stamped and embossed a final layer of images over the background using Versamark/Perfect Medium and clear embossing powder.
The sentiments are from a favourite Jane Gill stamp set.
On the first card I used the left over panel and die cut the Sue Wilson Love from the center of it. I then die cut it again from white funky foam which I placed in to the negative space in the panel and added the card layer over the top. This raises it above the main panel for added dimension.
A final touch was to cover it in Glossy Accents and add a stacked card frame in white.
I hope that you will find some time to join in with our latest challenge. I look forward to see all your crafty makes.
Have a great evening.
Happy Crafting and hugs
Kimx

Sunday, 28 June 2020

Andy Skinner Stencilled Dove

Evening Everyone,
I had a lovely day today with a rather unexpected visit to see my Mum, so no crafting, but who cares, I got to put a smile on a lovely ladies face.
My card tonight uses the wonderful Andy Skinner Dove Stencil that formed part of my box of goodies from Creative Expressions this month.
The background is created with Airless Mister Sprays, and then I ran it through my embossing machine with the stencil and a baby wipe over the top of it. A technique that I picked up from the fabulous Jennifer McGuire.
The baby wipe removes some of the ink and then with the stencil still in place I added some of the Golden Sand Glitter Kiss which has become a firm favourite with me.
Off to bed now which is very early for me. I've had a phone call from my Boss asking me to start work at 4am tomorrow, so I had better try and get some sleep which may prove a little tricky.
Thanks for stopping by. Please don't forget Jamie's shows tomorrow on Create and Craft using Sue Wilson Festive dies.
Stay safe and hugs
Kimx

Friday, 5 June 2020

Sending Sunshine

Afternoon,
OMG, what a difference in the weather today. Having had the hottest May for years, are we now in for the coldest June? I can't say that I am too disappointed, since the last few weeks have been rather too hot for me, but seriously couldn't you have eased us into it a little more gently lol.
 
So I thought that I would share a card with some nice bright flowers on it to cheer you up and send you some sunshine.
It has been made using the fabulous floral flamingo from the latest Designer Boutique range that launched recently at Creative Expressions.
 The flowers were coloured using ink sprayed from the Airless Mister Sprays on to a craft sheet.
The blue background was created using the floral part of the stamp, black ink and clear embossing powder.
I painted some of the tiny flowers with bleach, and the leaves with a Gelli Roll glaze pen.
I added a few gems and the 'Sending Sunshine' sentiment. Very appropriate for today I think.
I hope that you all have a wonderful weekend.
Stay safe and Craft.
Hugs Kimx

Tuesday, 2 June 2020

New Designer Boutique Stamps

Evening Everyone,
Creative Expressions have launched some more stamps in their Designer Boutique range, and I was lucky enough to get to play with a couple of them.
I also got my hands on a couple of their fabulous Airless Misters, which is what I used to create the background.
I stamped and embossed the Floral Flamingo onto a piece of mixed media cardstock using versamark ink and white embossing powder.
I spritzed the image with a couple of different colours and then used the same inks to paint parts of the image.
I decided to use the floral part of the image to stamp and emboss the corners of the main card, again using white embossing powder, then I sprayed with the same colours so that it looked like the panel was cut from the centre of it. 
I matte and layered the circular panel onto white and then black and added it to the centre of the card using craft foam for added dimension.
The sentiment comes from the same stamp set.
Gwen will be showcasing these designs on Create and Craft this Satuday 6th June, so why not join us,
Have a great evening. Stay safe.
Happy Crafting and Hugs
Kimx