Followers

Showing posts with label sizzix dies. Show all posts

Wednesday, 9 June 2021

Floral Sparkle

Evening All,

Another scorcher, and I was mad enough to go to the gym with my friend. It's no wonder that I am struggling to stay awake lol.

So just one quick card tonight, before I fall asleep. The background was created with a couple of colours of Cosmic Shimmer Airless Misters and some clingfilm.
Once the ink had dried I removed the clingfilm and trimmed the panel into a square before adding a frame created with a new Sue Wilson die.

The wildflowers are cut in black using a new Sizzix die. Such an easy card to put together, but I think the wildflowers compliment the background perfectly.

Thanks for stopping by. 

Hugs Kimx
 

Sunday, 25 October 2020

A Paper Anniversary

 Evening

I hope that you have had a great weekend. I feel like my crafty mojo has finally returned, hopefully for longer than a couple of days.

A friend asked me to make a 1st Anniversary card for her daughter.
As the 1st Wedding Anniversary is 'Paper'
I picked some paper with book print on it
for the background
and also the handmade flowers.
I used a Paper Rose die for the square floral panel
and Tonic alphabet dies for their names.
I coloured the tiny heart buttons with my alcohol markers,
and added some stamen, Sizzix foliage and glitter card.
I really enjoyed making it which is the first time in a while that I can say that.
Thanks for stopping by.
Hugs Kimx


Friday, 31 January 2020

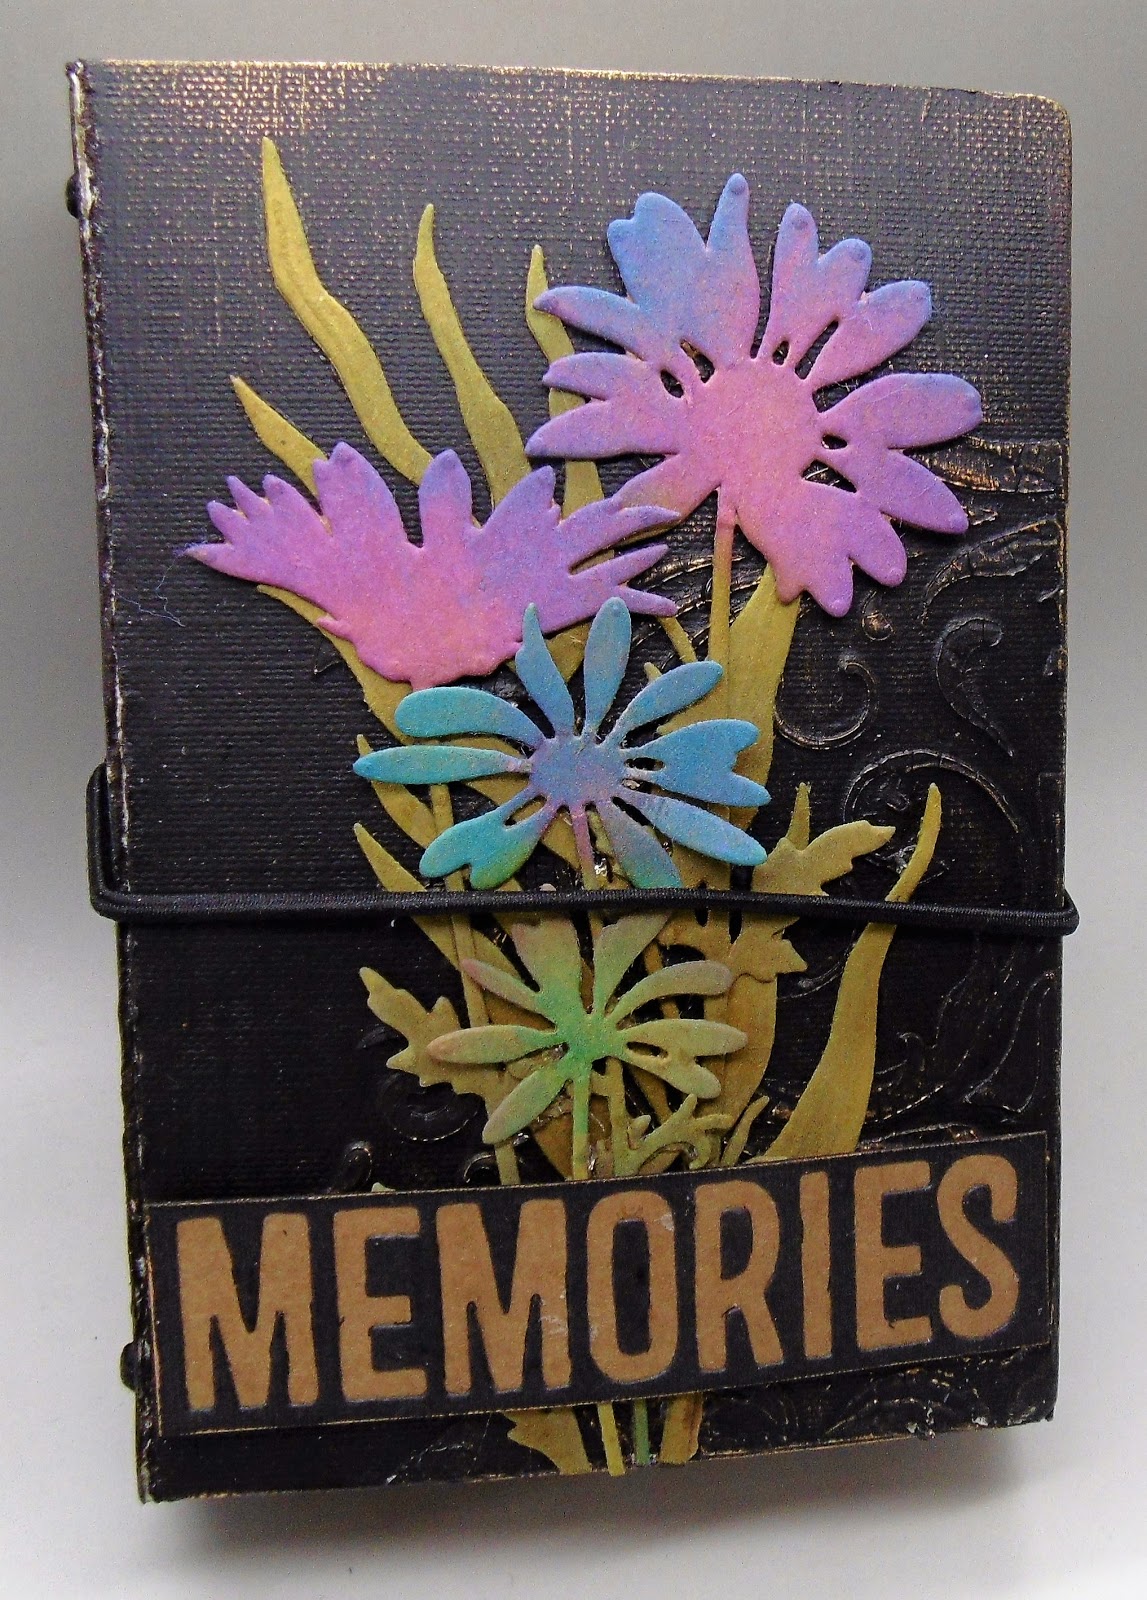
A Memory Book

Evening Everyone,
I have just spent the most enjoyable day prepping for my class tomorrow.
We are making books using the wonderful Sizzix Wrapped Notebook Die designed by Eileen Hull.
 I saw it on Hochanda some time last year and just had to have it,
but haven't had the chance to play till now.
Oh boy, have I had fun. I can see lots of people getting these as present.
I also have the Passport Journal die which cuts pages that perfectly fit the Wrapped Journal.
I die cut some more of the flower and foliage images that I used on the front only this time out of funky foam,
and used them to stamp on the pages using Distress Oxide inks.
It just gives the pages a little extra interest.
This is very Mixed Media for me.
I added some texture paste to the front through a stencil cut from card using a Tim Holtz die and then added a little Gilding Wax. 
I used elastic to fit the pages into the journal, and also as a means of closure.
I'm not sure that it will stand up to being carried around in a handbag, but it will definitely make a good place to keep lists so I think that I will make one as a notebook tomorrow.
I hope that 'The Girls' will enjoy themselves as much as I have.
Have a great evening.
Happy Crafting and Hugs
Kimx 

Thursday, 11 December 2014

Countdown to Christmas - Day 11

Hi All
I'm hope that you are reading this without any problems and that I am having a quiet and uneventful day at work after last night celebrations.
I am having to schedule this post as my computer needs to go and see my friend Joe and be given a little TLC before I throw it across the room.
I am struggling with the Internet at the moment as every time I try to do anything I get all sorts of pop ups appear at the side of the page which won't go away. It is also making things run incredibly slowly, so writing this seems to have taken forever.
I'm not even going to try and put in any links as the air will turn blue with very bad language :O)
Still enough of my moaning, here is a card that I made for a class on Embossing folders recently at SirStampalot.
The sentiment panel is a rather old, but very nice, embossing folder which I have coloured using the Metallic Waxes that are supplied by Woodware.
I have used stencil brushes to add the colours to the embossed panel and then 'wiped' a dye based ink pad over the whole thing so that the ink 'hits' the raised areas and highlights them.
I have then heat embossed the entire thing using clear embossing powder.
I love this little hedgehog which is an old Penny Black design which can now be found on a clear stamp set.
The die cut holly is from a Tim Holtz Alterations set of dies which was among my purchases during my stay.
I am really loving these waxes, they are so creamy, and really easy to apply with the stencil brush which saves wasting half the wax up underneath your finger nails as you try to take it out of the pot lol.
I hope that the weather doesn't live up to the sentiment on the card, although they do say that it warms up a little with snow. I'll settle for some rain instead.
Have a great day, and happy crafting.
Hugs Kimx

Monday, 17 March 2014

A Bunch of Blue Tulips

Evening Everyone,
I can't believe that tomorrow is the last day of my all too brief holiday at SirStampalot. I must admit that I have had to cut it short this time, but even so it only seems like yesterday when I was being collected from the station.
As usual I have had a wonderful time, and have managed to create quite a few cards for the shop so I hope that I have been of some use.
My share tonight is one such card. It has been made from a piece of background paper created with acrylic paints and the Gelli Plate.
I stamped and embossed Art Impressions Tulip Bunch onto the handmade background paper and then ran it through my Cuttlebug using an embossing folder, having first coloured the tulips with Copic Markers.
The leafy border at the side of the panel uses Sizzix Decorative Accent and Leaves die cut from Dotty Swiss Bazill card stock. I love being able to match things up with papers from the shop even if it does add to my STABLE (see blog post HERE).
The sentiment is from Stampendous Birthday Wish Assortment clear stamp set stamped and embossed using Distress inks and clear embossing powder.
The pre-printed background papers are all from the shop, and the stripy one has been dry embossed using Sizzix Starry Night Embossing Folder.
The corners of the card have been embellished using the Martha Stewart Photo Corner Punch and also a little stamping using Art Impressions Serpentine Background.
I had hoped that my suitcase would be a little lighter going home as I am leaving 4 boxes of cards with them to photograph for their gallery. However seeing the size of the box under my table full of crafty stash I think that that may be a vain hope lol.
Thanks for stopping by,
hugs Kimx

Monday, 4 November 2013

Cinnabun or Sycamore

Evening Everyone,
Now I realise that this is a rather tenuous connection, and a little bit of a private joke but I wrote this post earlier whilst consuming half of the most enormous, and delicious chocolate cinnabun.
Nick, who works with Janice and Andy visited Cambridge at the weekend where there is this shop devoted to Cinnabuns and he bought some home for us.
I dread to think how many calories there are in one, but boy was it nice lol.
Still enough about food, on to the card for this evening.
Janice usually has some sort of challenge waiting in a box for me when I stay with them, and this time it was some skeleton leaves.
I used them to create the central stamped panel on the card by pressing onto them with a heated Magic stamp. This then becomes the stamp which I inked up with pigment inks. Once again I used my new Movers and Shapers leaf dies and a tiny Woodware punch.
The tree names are from a Woodware clear stamp set designed by Jane Gill which I cut out and mounted using rectangular and deckle edged Nesties.
I am teaching a class tomorrow evening so I have been doing some last minute class prep. Yes I know, it's always last minute with me, but at least it means that I can be current with what is in stock. That's my excuse anyway lol.
Do you think I will work off any of that cinnabun in my sleep? I think I had better try.
Night night.
Hugs Kimx

Sunday, 3 November 2013

Poem Tree

Evening Everyone
I hope that you have all had a wonderfully relaxing weekend.
We got our lie in this morning, some of us for longer than others (Andy and Janice), so we have had a fairly laid back time at the unit getting some tidying and sorting done. Well at least Janice has, I have been playing. I'm on holiday remember!
This is one of the cards that I finished today. I'm not sure that I like it as it looks here, but it looks so much better in the flesh!!
I have used the foliage part of the Stampendous Poem Tree to stamp around the edge of some lovely background paper that I found in the shop. I meant to write down all of the codes so that I could tell you what I used, but they are at work, and I am sitting in bed writing this so that didn't work did it??
The leaves are cut using my newly acquired dies. They are actually Sizzex Movers and Shapers dies designed to go inside one of the larger cutting dies, but they went through the Cuttlebug perfectly using 2 C plates as the sandwich.
The leaves have been cut from papers I found in the shop, and layered over the stamped and embossed panel. Did I say I wasn't going to buy any more papers? Well I lied lol.
We will be using this fabulous stamp in class on Tuesday evening, so I'm sure that you will be seeing more of it over the next couple of days.
Oh dear, look at the time and no lie in tomorrow, so I had better get some sleep.
Catch you again tomorrow.
Night night.
Hugs Kimx