Followers

Showing posts with label watercolour stamping. Show all posts

Monday, 13 February 2023

Back in the Zone

Evening,
Finally a successfully crafty day. I have been distracting myself with my cross stitch over the last few days, in the hope that following a pattern that I have chosen and love, will get my creative juices working. But with a deadline looming I have had to just sit and play, and I have finally got in to the zone.
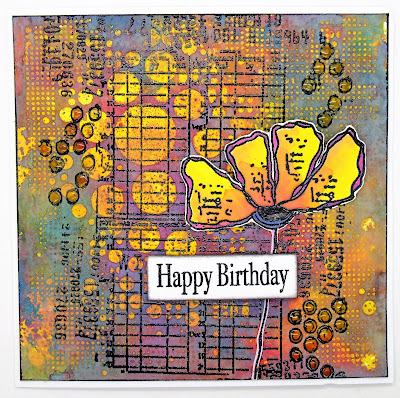
Of course I can't share any of it with you, so here instead are another couple of cards made using fabulous Aall and Create stamps and Distress Oxide inks.
I do love a mop up background, they are always so different.
I have to admit though that sometimes it is a bit of stamping that turns them from something that I am really not sure about, into something that I absolutely love, and a bit of painting with bleach never hurts.
Another fabulous way to use Distress inks and Oxides is with this rather wet and wispy Watercolour stamping technique.
It is so much easier to achieve if you use a Misti or Stamping Platform of some type as the technique  requires that you re-stamp over the image once you have first stamped onto the wet card with your Distress inks.
Now I just need tomorrow to be as successful as today and I'll be a happy bunny.
Thanks for stopping by.
Love and Crafty Hugs
Kimx

Thursday, 9 February 2023

Distress Micro Glaze, Stencils and Oxides.

Evening, 
As I've told you before, I have boxes of cards that I have made over the years, just waiting to be shared with you.
Here are a couple made during a playtime with Distress Micro Glaze, stencils and Distress Oxide inks.
I was inspired by something that I saw on Pinterest, I think, but of course I can't find the cards that inspired me now.........typical.
I loved the colours that they had used, and decided to combine the technique with some fabulous Aall and Create stamps that I own.
A smaller panel on this card, along with some double stamping for a very watercoloured effect.
I have several other cards made with this rather blurred background technique, so I will share them on another occasion.
Thanks for stopping by.
Love and Crafty Hugs 
Kimx

Monday, 6 February 2023

Spring colours and Wildflowers

Evening,
What a gloriously sunny start to the day. It was a bit chilly with evidence of a frost, but beautiful sunshine.
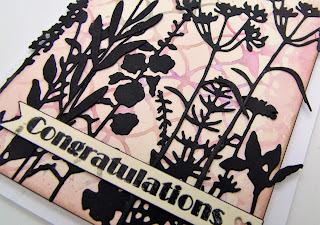
So here are a few cards featuring nice spring coloured backgrounds and wild flowers.
The background to this first one is created using a stencil and Brushos.
The background to this one is made using the Brushos left on the stencil after creating the previous background.
Die cut wildflowers are a great way to use up Handmade Backgrounds without hiding too much.
The background to this card is made using one of my absolute favourite Embossing Folders for this watercolour technique.
Ink one side of the embossing folder with Distress inks and then spritz with water before placing a piece of watercolour card inside. Instead of running it through an embossing machine use pressure from your fingers to transfer the ink to the card, without adding texture.
I told you this was a favorite Embossing Folder. Another background created like the last, in fact you can often get a second impression, just by adding more water.
I've stamped and embossed onto this background, silhouette stamps work just as well as die cuts.
Thanks for stopping by
Love and Crafty Hugs
Kimx

Sunday, 6 November 2022

Thank You... For Your Kindness

 Evening,

It's been another wet and miserable day here. 

I had to walk to Horley and back today to get my Covid booster, rather unsuccessfully dodging the torrential rain. 

One delightful car driver decided that it would be a jolly wheeze to drive as close to the kerb as possible and soak me. To add insult to injury he then turned around and drove on the wrong side of the road through a huge puddle thus soaking me again!!!!!!!!!! I so wish that I had been able to catch his registration number as my friend has just informed me that it is an automatic £1,000 fine.!! Oh to have been a fly on the wall when that letter arrived.

Since Mum came out of hospital in September, after fracturing her pelvis, we have been lucky enough to have a fabulous team from Reablement to help her in the bathroom each morning. They are a lovely bunch of ladies, always smiling and helpful and eager to put Mum at her ease.
Our care package changes next week so we will have a new set of people to get used to. I do hope that they are as kind as the last. It is certainly not a job that I would like.
As we are currently writing a couple of Thank you cards, I thought that I would share one that I made earlier in the year to send up to SirStampalot.
I used a layering die, cut from white and glitter card.
The background to the card is created with Distress inks and then I used a die cut flower as a stamp. Stack several of the die cuts and stick them to an acrylic block. Use vellum for the last layer in the stack so that the water or ink that you use to stamp with doesn't soak into the cardstock.
I added some diecut and coloured flowers and foliage to the corner of the frame.
I added some tape to the back of the base flower to keep all the die cut pieces in place, and then added a second flower for added dimension.
I used the stamp that I created with the die cut flowers to stamp the background on this second card. It's only small, but I hate to waste any bits and pieces.
I've finally dried out, and so far I haven't had any ill effects from my Covid jab.
Thanks for stopping by,
Love and Crafty Hugs
Kimx

Sunday, 24 January 2021

Sam Poole Wildflowers

 Evening Everyone,

I've come to the end of my babysitting duties for another fortnight, which even finished with being brought home so that I didn't have to brave the cold. How thoughtful is that!

So here are another couple of cards that I made for Sam Poole's TV shows on Saturday. 

This time I focused on one of the fabulous rubber background stamps that form part of the collection CER022 - Wildflowers.

I inked the stamp using Cosmic Shimmer Chalk Cloud Blending Ink in pink and blue and spritzed it with water before stamping it onto watercolour cardstock. I used a stamping platform so that once dry I could stamp and emboss over the watery image using a grey ink pad.
I used the same pink and blue ink to colour in some of the flowers on the stamped panel. I also fussy cut three flowers from another stamped and embossed panel and added them in the bottom corner of the card along with some die cut foliage.
There was some ink left on the background stamp after stamping the first card so I added a little more water and then stamped it out to create this piece of background.
I stamped and embossed some of the botanical images from CEC958 Nature Finds and mounted the trimmed panel on to some blue cardstock.
I used the Rustic Honeycomb die in the background of the card, cut from blue cardstock.
Thanks for stopping by.
stay safe and hugs
Kimx

Friday, 22 January 2021

A Floral Watercolour 'Twofer'

 Evening All,

My wellies got another airing earlier in the week when I was about the only mad thing walking around the park in the rain. I did encounter one dog walker, and a couple kids jumping in the puddles with their Mum, but other than that I had the place to myself!!

I'm sure that it was a different story today as we had glorious sunshine, albeit rather chilly, but I was too busy to find out unfortunately.

Sometimes one stamped panel is enough to create two finished cards.
I wanted a raised frame on a card so I die cut it from a floral panel using Sue Wilson Pierced Rectangle dies.
I mounted it onto a card using funky foam for added dimension. I then stamped and embossed the sentiment onto another piece of card and die cut it using the smaller rectangle die and added it to the centre of the frame, this time using wet glue.
The beauty of these dies is that they are pierced either side of the cutting line so you get the dots whichever part of the panel that you use.
I couldn't see throwing away the central floral panel so I mounted it onto some lilac cardstock and created this second card.
I used the same sentiment, this time stamped and embossed directly onto the floral design.
Definitely a 'Twofer'. I like this kind of crafting............no waste.
The floral panel was created using dye inks randomly on a floral image and then stamped onto white card stock. I took a damp paintbrush and 'pulled' some of the colour on to parts of the design ie the flowers and leaves.
The finishing touch to both cards is the fine line of glitter glue around the edges.
Let's hope that tomorrow is as nice, and we don't wake up to a foot of snow!!!!
Thanks for stopping by.
Hugs Kimx


Wednesday, 13 January 2021

Its Playtime.

 Afternoon,

As I told you yesterday I am still on the DT for Creative Expressions, and today I received a fabulous parcel of stamps and dies to play with for Sam Poole's show on Create and Craft next week.

I haven't done anything crafty for weeks so this is just the spur that I need to get me going again.

In the mean time here is another Designer Boutique card made for Creative Expressions.

I added Peeled Paint, Forest Moss and Faded Jeans Distress inks to a long rectangular acrylic block before spritzing it with a little water and stamping it on to watercolour card stock.
Once dry stamp and emboss UMSDB036 Twilight Grazing  onto the watercolour background and trim. Also add a sentiment from USMDB042 Sending Love stamp set.
I added some Brushed Corduroy distress ink around the edges and then mounted the panel onto black card.
The card base has a panel of black cardstock covered in Golden Olive and Chocolate Bronze gilding polish. I then embossed it using EF043 Leafy Montage and added some Golden Sand Glitter Kiss.
I love these fabulous solid style images from Designer Boutique, they are just my thing.
Need to go and play now...................wow haven't said that in a long time.
Thanks for stopping by.
Hugs Kimx

Tuesday, 21 July 2020

Lino Cut Robin and Holly

Evening Everyone.
A couple more cards tonight using another of Jane's new Christmas stamp sets Lino Cut Robin and Holly.
 I love this set,
 and let's face it you have to have a robin on a card at Christmas.
 The watercolour look was achieved by first inking the stamp with distress oxides
 and then spritzing it with water before stamping it onto wet watercolour card stock.
 A stamp positioner is fairly essential for this technique, because once the ink has dried
you place the card stock back into the positioner and stamp directly over the top of the image in dark brown Versafine Claire ink
and then emboss with clear embossing powder.
This one just uses the dark brown ink,
and I think that without the Christmas sentiment it would make a perfectly good birthday card,
 particularly for a winter celebration.
These last two cards are made using a couple of first generation (unspritzed)
and second generation (spritzed) images.
Thanks for stopping by.
Stay safe. Happy Crafting and hugs
Kimx