Followers

Showing posts with label tim holtz die. Show all posts

Saturday, 2 November 2019

Halloween Chalenge at CCM

Hi All,
I am soooooo sorry for the tardiness of this post, but it seems to have been a manic few weeks, coupled with an Internet connection that seems to drop in and out every few minutes to the point where I have abandoned trying to use it at all.
Anyhoo it's my turn to host the challenge over at CCM, and as you may have guessed the theme is Halloween.
I have to say that it is not something that we celebrated when I was a kid, but then I am old lol.
Now it seems to be a big thing, and my Girls love it. There are always loads of sweeties for the Trick or Treaters, and the house is usually festooned with cobwebs and all sorts of scary things.
I spent the day wearing a rather batty headband that I had strung with lights. I did get some looks as I travelled on the train, but it certainly put a smile on a few peoples faces.
My card uses a fabulous old LOTV topper and lots of Tim Holtz dies.
The wizard was a little too cute, so I trimmed away his teddy bear when I fussy cut the image.
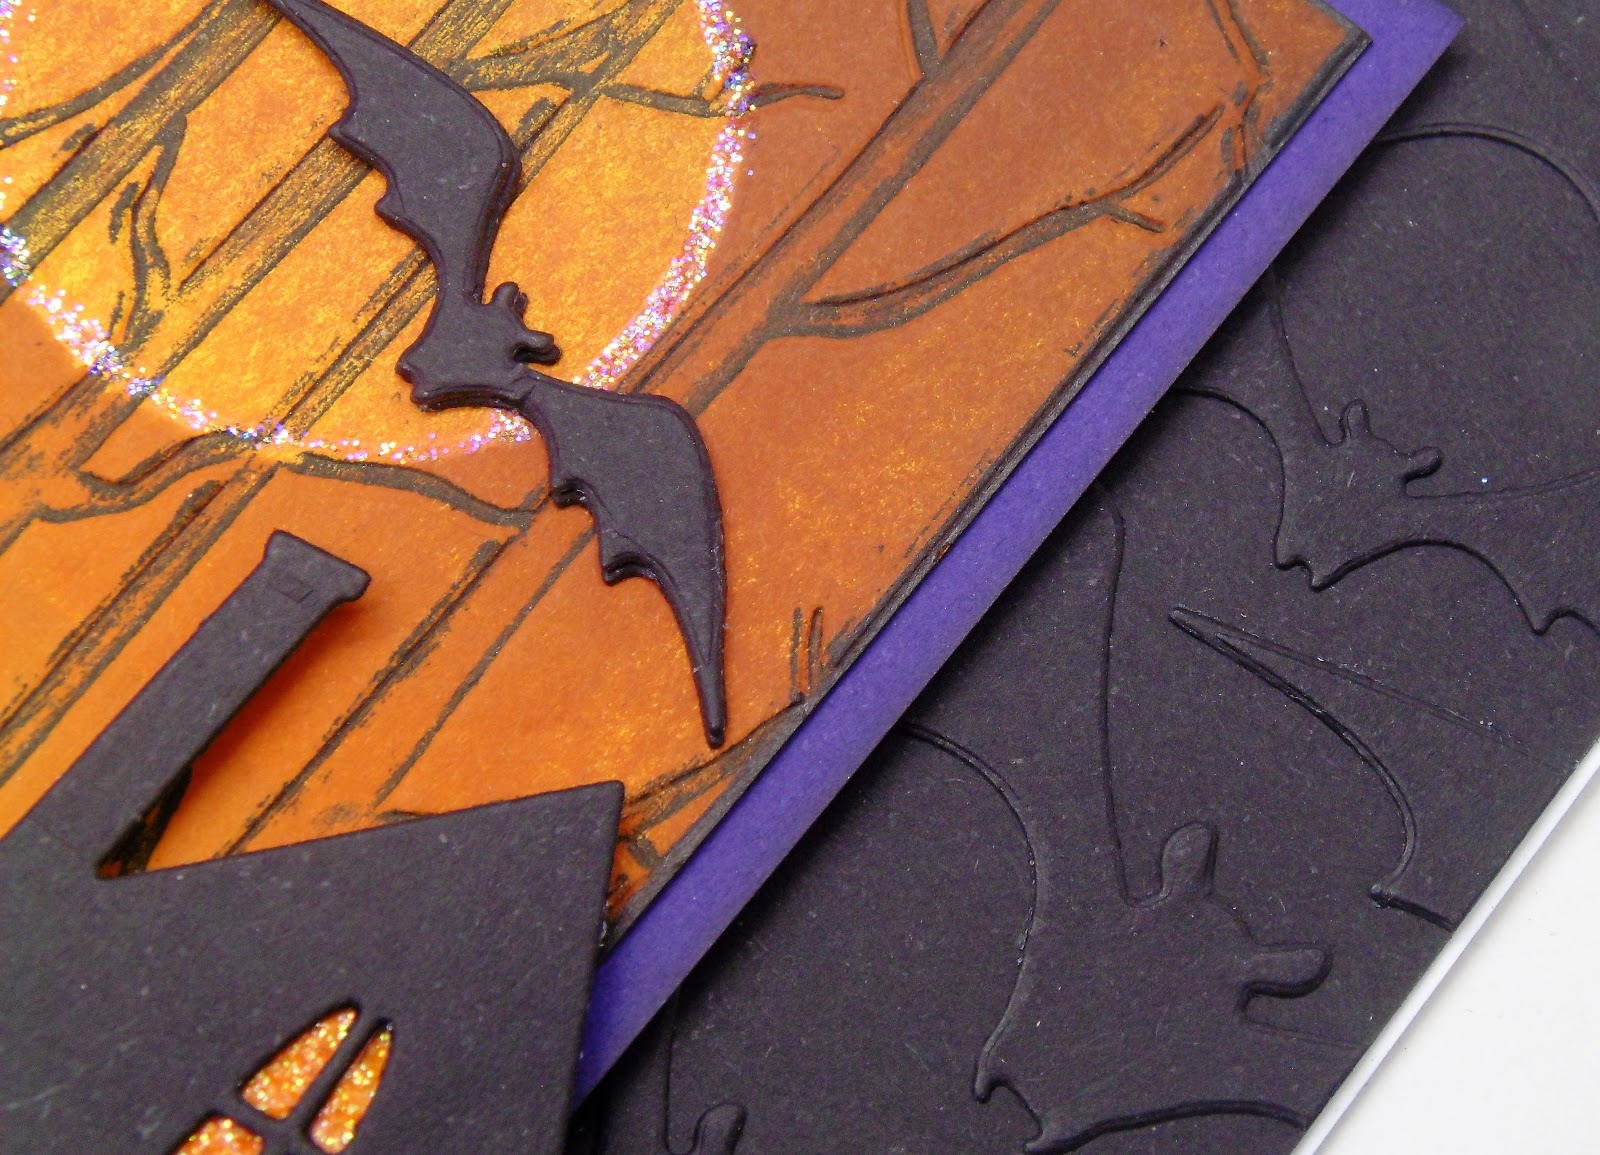
The background was created by attaching die cut bats to the black card base to add a little interest and dimension.
I found the letterpress tree panel amongst my stash and added some glitter around the moon, and a couple more bats.
The spooky house and tree are also from Tim Holtz.
I added a bit of sparkly card behind the windows,
and then a bit of funky foam for added dimension.
The spooky branches are another Tim Holtz die.
The sentiment is from a new set that I bought from Simon Says Stamp. It is a fabulous set with loads of little sentiments, and it has a coordinating die so you cut them all out at once.
I promise that I will get round to see you all over the next few days.
I am off to Sir Stampalot for my annual holiday, and I am soooo looking forward to it.
Have a wonderful crafty weekend.
Crafty hugs
Kimx

Monday, 21 January 2019

Leafy Thanks

Hello All
Maybe if I can just stay one step ahead of myself I might get a few more of my card mountain blogged. It's not working well so far, but I can only hope that things get better lol.
Today's cards were made using a fabulous old Stampendous leaf stamp set and a Kaleidacolour dye based ink pad.
These lovely multicoloured ink pads lend themselves very nicely to the painting technique that I have used here, as do the patterned leaves.
I created a Masterboard by stamping the leaves randomly on to Mixed Media card stock using the Cappuchino Kaleidacolour ink pad.
A damp paintbrush was used to colour in the leaves using the ink from the stamped image. Because it is a dye based ink the colour will move when water is added, just make sure you keep washing your paint brush so that the painting doesn't become muddy.
I used an Edger die to create this lovely border,
and the waste to create the white panel on the right hand side of this second card.
I sponged more  ink on to the master board and added sentiment panels.
The main panel on this card uses the same patterned leaf stamp along with a smaller similar shaped leaf.
This time I stamped and embossed the images before sponging and painting them with dye based ink.
I used a Tim Holtz die in the corner of the card,
and added a sentiment on a strip of vellum along with some die cut leaves.
Have a great evening. I'm off to visit a few blogs before I get too far behind on my commenting.
Happy Crafting and hugs
Kimx

Monday, 5 February 2018

Hobby Art Butterflies

Hello All,
Well I made it through a whole day at work.
I have to say that taking the week off to recover was probably the most sensible thing that I have done in a long time cause I actually feel better. (At least at the moment lol)
Here as promised a while ago are a couple more cards from Hobby Art Jenny's last TV show.
Sorry I didn't manage to get them on here earlier, still better late than never I suppose.
This time they feature the fabulous Butterfly set.
I decided that I wanted to use the largest of the butterflies as it makes such a wonderful focal point. I die cut the corner out of a piece of black card stock using one of Tim Holtz ornate corners.
Having trimmed the panel I gently applied gilding wax and a stamped and embossed sentiment before adding the panel to a white card base.
The butterflies have all been stamped and embossed in black and then sponged with dye based inks.
This second card uses the same images only this time they are stamped and embossed in gold before applying the dye based inks and fussy cutting.
The background has been created using a fabulous 'vintage' embossing folder and black card stock.
Once again I used gilding wax to cover the whole of the background, only this time it was the excess wax that had dried on my craft mat reactivated with Stick Away from Crafters Companion.
Thank you Sheena for that little tip.
Because there were various colours of wax on the mat at the same time it has given the background a slightly muddy look, but I rather like the effect.
I sanded the card back after I had covered the whole thing with wax so that the black showed through.
I added the fussy cut and shaped butterflies using silicon glue along with a sentiment.
I think an early night is in order tonight. I don't want to overdo things.
I won't promise to be back tomorrow, but I will definitely try.
Happy Crafting and Hugs
Kimx

Sunday, 18 December 2016

Embossing Folders made from Dies

Evening, I mean morning Everyone,
Not a Christmas card in sight today, unless you count the ones that were passed out in class yesterday. In fact that is the reason that I didn't get to post this on Saturday evening as intended, I was having way to much fun playing with non christmassy things for a change.
 We were playing with Tim Holtz Thinlets Mixed Media dies.
I love these dies, but this time I used them to create an embossing folder.
I cut them out of thick card from the back of a 12x12 paper pad and then used them to emboss the corners of all of the following cards.
Lots of lovely pastels and my favourite Unity stamp set.
Same stamps and colours just a different embossed corner. The beauty of using these dies is that there are also stencils available to match them. I used the matching floral stencil to create the background on the base card.
Now you know that I don't like to waste anything so I used the piece of card that I was resting on to clean up my stencil for the background to this card.
A more masculine feel to this one using a a fabulous Hero Arts stamp.
And one last one using a Woodware stamps this time.
I know that I am a collector of all things craft, especially stamps and dies, but it is always nice when those things that you have amassed turn out to have so many more uses than you originally thought.
I still have lots of cards to write so I had better get back to it, although I might just have one more little detour. I have enjoyed playing way too much.
Have a great day.
Happy Crafting and hugs
Kimx

Sunday, 18 September 2016

Spiders Web and Florals

Afternoon Everyone
How quickly the weather has gone from Summer to Autumn.
Of course there is still plenty of time for an Indian Summer, but for now I will just be grateful that the nights are cooler and I am able to sleep.
As usual I got rather carried away when prepping for this weeks theme over at WoodwareWitterings, 'Time of Mellow Fruitfulness'.
I never know what I am going to make so sometimes I end up with extra bits and pieces whilst I play.
That was just the case here where I dry embossed a couple of sheets of card with the fabulous Spiders Web mask from Dutch Doobadoo.
I coloured the panel using dye based inks and then added some die cut Silhouette Florals in black with a little Gilding Wax brushed onto them.
I used the spider and web from a fabulous stamp set that I bought from Card-io when I was at a show in Doncaster in July.
Of course if I had waited till today I could have used the Tim Holtz 661588 Mixed Media Halloween thinlets die that I bought at Ally Pally yesterday.
While I was finishing things off I created this card using a panel created by dry embossing a Dreamweaver Spiders Web stencil and adding sponged dye based ink and Gilding Wax.
Again I added die cut florals, this time in black and white.
I had a fabulous time at Ally Pally on Saturday. I haven't been to a show there in years so it was lovely to catch up with friends old and new.
I spent far too much, but then isn't that what I go to work for lol.
Better get a few more bits finished off, it will be back to work all too soon.
Have a great day, what ever you are doing.
Crafty hugs
Kimx

Tuesday, 9 August 2016

Happy 1st Birthdays

Morning All
I can't believe that it has been a over a week since Emma's 1st birthday party, and I still haven't shared her card with you.
I just couldn't resist some Hobby House toppers when I was at the show in Doncaster last month.
They are always so useful when time is in short supply,
or when the image looks just like my cheeky Granddaughter Emma.
Not that she makes a habit of strangling small birds you understand - honest lol.
I decided to keep the card fairly simple as I wanted to incorporate the lovely wooden letters which were also purchased at the show.
The sentiment and number are from a fantastic Hobby Art stamp set which is going to prove very useful over the next few years.
I layered my topper over a rosette of card cut using the Tim Holtz Mini Paper Rosettes die.
While we are on the subject of 1st birthdays, here is the card that I made for Myla, my Great Niece, way back in May.
A LOTV topper this time and some rose themed papers as she is Myla Amelia Rose.
Have a great day with time for a bit of crafting I hope.
Hugs Kimx

Saturday, 2 January 2016

Sweet 16

Hi All,
Are you having a good weekend?
I have managed to catch up on a couple of 'crafty things' today so I am starting to feel much happier.
Each year, before Christmas, I have a card to make for my Boss's daughter who this year turned 'Sweet 16'.
Every time he asks if I can make one to include a photograph of her, and each year he forgets to get the photo to me. This year was no exception so I was armed with only her favourite colour as my starting point.
I love to make the patchwork backgrounds, so it seemed a rather good place to start.
I chose some background papers from my stash in matching shades of pink and brown, and used a double sided stick sheet to attach the punched hexagons.
I used some of my Grand Nestie dies to create the main card, and then a selection of dies for the sentiments (Tim Holtz/Sizzix)
individual letters and number (Marianne Collectables),
flowers and leaves (Sue Wilson).
The girls always appreciate their cards, which is nice, because it is almost impossible for them to get anything that has their name on, so this makes it very special.
See, I do have my uses lol.
The same evening I was asked to personalise a photo album as a gift for a 60th birthday, so I used up a little more of the patchwork background and some large die cut numbers.
Off to try and catch up on a couple more bits before I call it a day. I'm on a roll so I don't want to spoil it.
Hugs Kimx