Followers

Showing posts with label step by step tutorial. Show all posts

Monday, 19 July 2021

Steps for Bubble Greenery

Evening All

A few weeks ago I pointed out the folly of trying to die cut a panel to which you have already added glitter glue, gems and faux card candi stuck on the silicon glue.

I was determined that I wasn't going to chuck it in the bin just because the silicon felt a bit 'furry', so I mounted the panel onto a bronze card and then tried a little camouflage.
One of my go to glitter glues is Stardust, whose sparkle seems to go with anything,
so I gently blended some all around the wreath to disguise the silicon. I think it works ok. I also added a stamped, embossed and die cut sentiment from Lisa Horton.
The card that was making was for a Step by Step instruction sheet, so I had to start again after my minor disaster.
Since I have the steps written already, I thought that I might share them with you all.

Steps:

  1. Create a stencil from a piece of card stock by die cutting the Bubble Craft die several times.

  2. Stamp and emboss the Bubble Greenery wreath onto the top part of a 16 x11.5cm piece of Coconut white cardstock, using Onyx Black Versafine ink. Add a stamped and embossed sentiment from the Bubble Greenery stamp set.

  3. Use the stencil you created to gently blend Tumbled Glass Distress Oxide around the edges of the stamped and embossed panel using a blending brush.

  4. Tap a little Brushed Corduroy, Tumbled Glass and Peeled Paint Distress Oxide ink on to a craft sheet and use it to paint the wreath. Add plenty of water to the image with a paintbrush before adding the ink to give a very blended watercolour look.

  5. Add water to the Brushed Corduroy Distress Oxide ink on the craft mat and splatter the panel with drops of ink from a paintbrush.

  6. Tap around the edges of the panel with an Onyx Black Versafine inkpad and emboss with clear powder. Layer the panel on to a piece of cinnamon cardstock and trim to leave a narrow border.

  7. Apply Brushed Corduroy, Tumbled Glass and Peeled Paint ink on to scraps of coconut white cardstock using a blending brush. Emboss each strip of colour using clear embossing powder and a craft heat tool.

  8. Use the Bubble Craft die to cut candi from each of the strips of coloured and embossed card.

  9. Choose your candi and shape the back of each one using a ball tool and shaping pad.

  10. Add the shaped candi to the layered panel using mini mounting pads and a drop of glue to allow a little maneuverability.

  11. Paint the smaller circles on the panel using inks and Gelli Roll Stardust pen.

  12. Create a card base using a piece of Aqua cardstock and stencil around the edges using the home made stencil, Tumbled Glass ink and a blending brush.

  13. Add your prepared panel to the card using mounting foam tape for added dimension.

  14. To finish the card off add glossy accents and glitter glue to smaller circles.

Hope you have a good evening. Thanks for stopping by.

Hugs Kimx


Friday, 22 May 2020

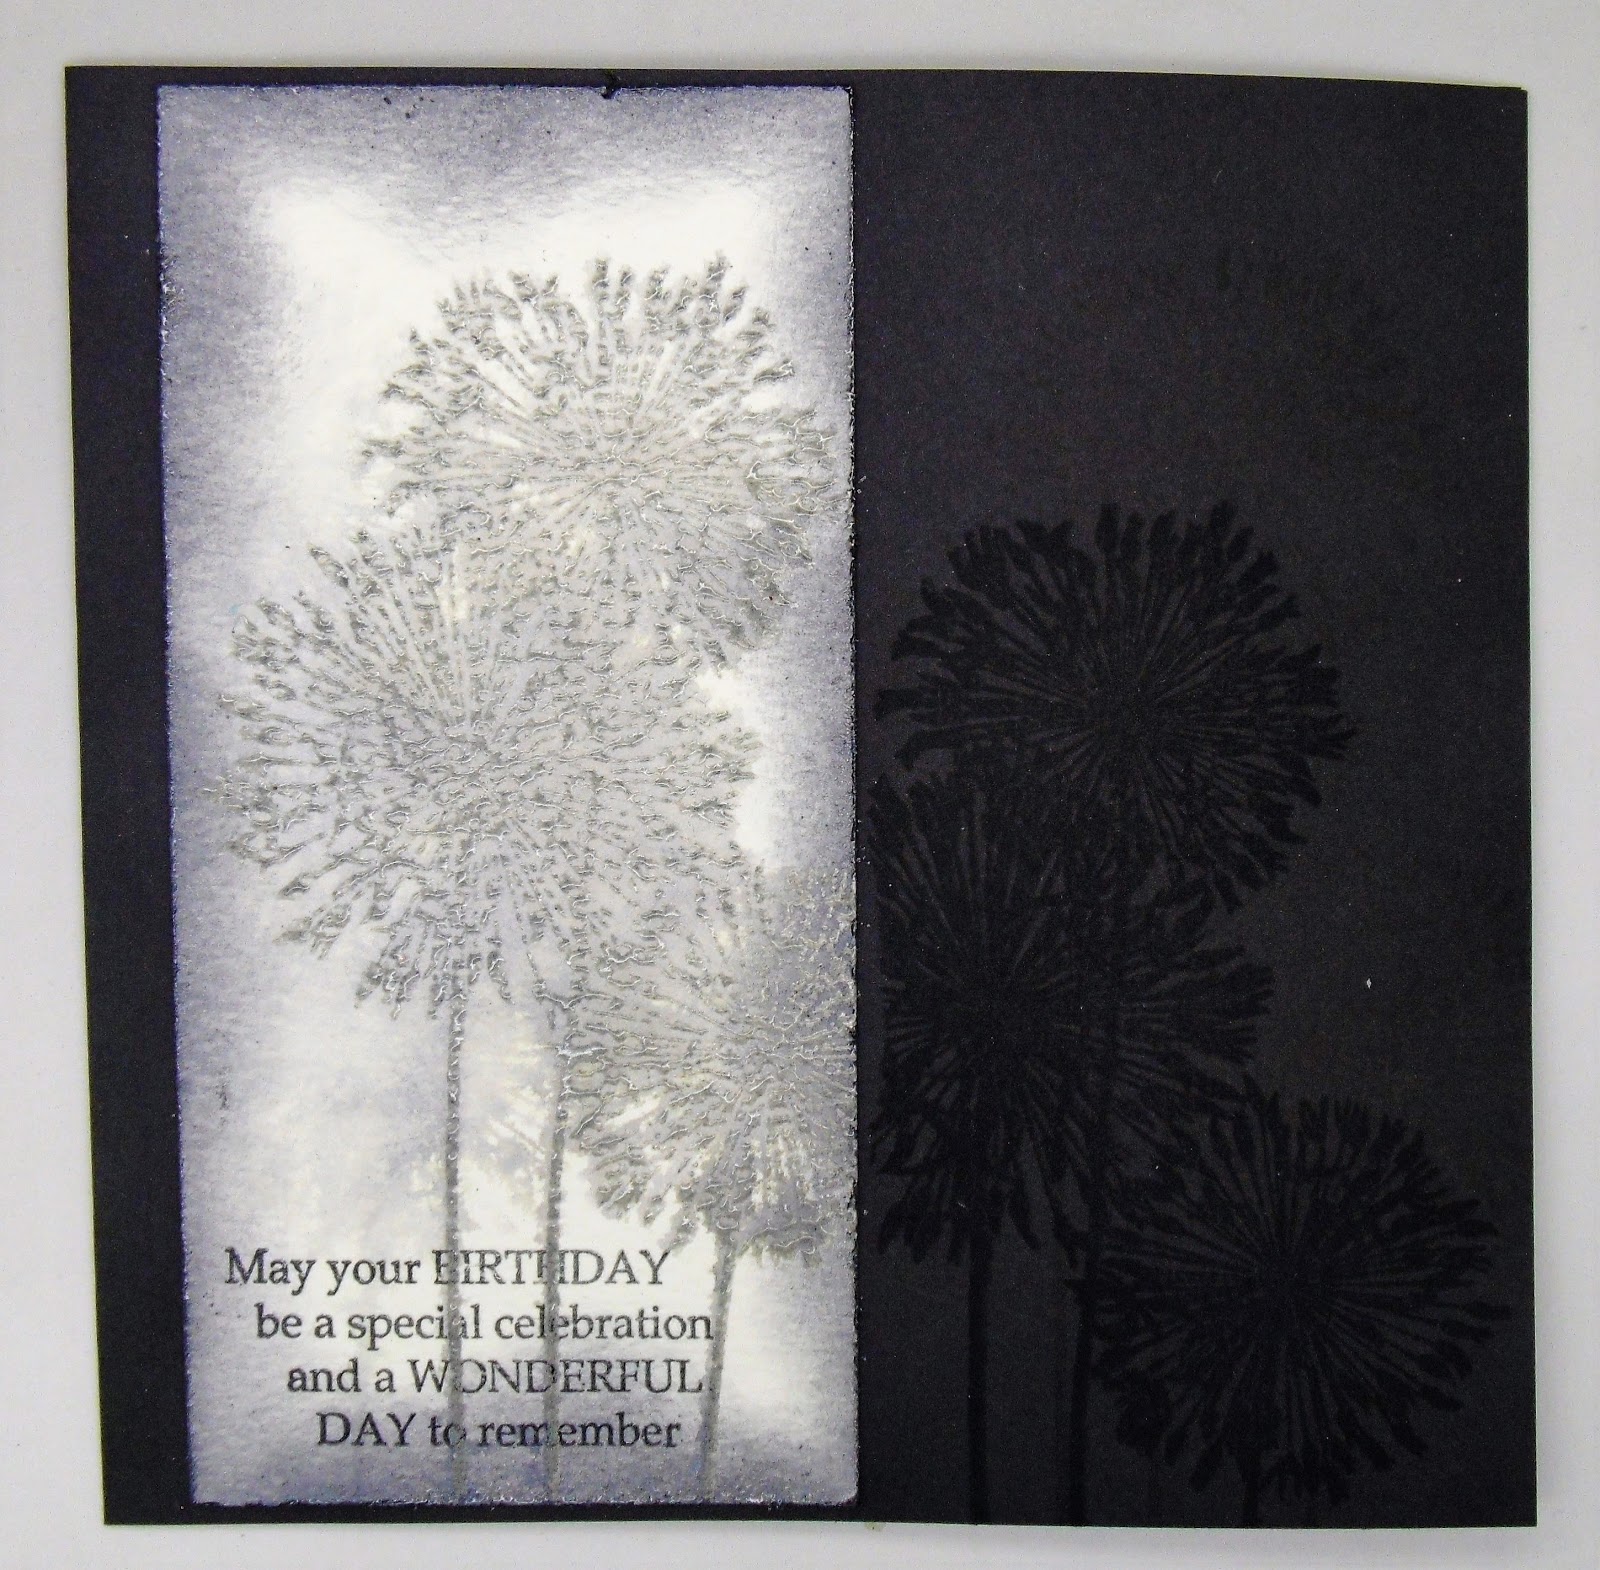
Designer Boutique Agapanthus Steps

Hi All
I recently had to write step by step instructions for a card I made for a new release from Designer Boutique under the umbrella of Creative Expressions.
Having taken the time to write them, I thought that I might as well share them here with you.

1/ Trim a piece of mixed media card to a 15cm square and place into a stamping platform. Remove the white backing paper from the stamp and position on the left-hand side of the cardstock in the positioner. 
2/ Ink the stamp using Hickory Smoke Distress Oxide Ink. 
3/ Spritz the cardstock in the stamp positioner with water. Spritz the inked stamp with water and stamp onto the wet cardstock. 

4/ Move the card slightly to one side and spritz the stamp again, without reinking it. Stamp again onto the cardstock. Dry the stamped images with a Craft Heat tool and replace in the stamp positioner in its original position.

5/ Reink the stamp and stamp over the top of the original rather blurred image. Move the card stock again, spritz the stamp without reinking it and stamp again.

6/ Repeat these steps several more times until you are happy with your background.
7/ Make sure that your background is completely dry and then place it back in to the stamp positioner. Ink the stamp with Black Soot Distress Oxide Ink and stamp on to the right hand side of the panel. Cover the image with clear embossing powder and heat with a craft heat tool.
8/ Blend around the edges of the panel with Hickory Smoke Distress Oxide Ink.
9/ Attach 3 pieces of ribbon to the lower part of the panel. Use DSST on the rear of the cardstock to keep the ribbon in place. Attach each layer with DSST one at a time.
10/ Layer the finished panel on to black cardstock, and then silver, before mounting on to a large square card.
11/ Stick 3 Finishing Touches Small Circle Dazzles to the top right hand side of the card.
12/ Tie a small bow to the narrowest of the three ribbons attached to the bottom of the card.
Of course as always I had a left over piece to finish off.
I hope that these are useful.
Have a great weekend. Stay safe and craft.
Hugs Kimx


Friday, 17 October 2014

My First Step by Step Tutorial

Evening Everyone,
Welcome to the weekend ............again. Where on earth has another week gone to.
It is my turn to post on the Hobby Art Blog, and I'm only one day late this time so that is an acheivement in itself lol.
I thought that I would share one of the cards that I made for Jenny’s last TV appearance, and at the same time clear up the mystery of how to create the background on acetate. 
The picture that I took of the original card is not very good, (acetate is so hard to photograph) so here is another one that I made as a Birthday card.
I’m not a great one for step by step instructions, because to be perfectly honest, until I start to play I have no idea what I am going to end up with, so you will have to forgive me if my steps are not up to everyone elses standards. 
They also use different stamps.
These are most of the items that I used to create my acetate panel, although I did forget the Blending Solution, and it is hard to see the acetate in the middle of the picture.
Add a drop of each of your chosen colour of Alcohol to a piece of felt attached to a Blending Tool.
Tap the blending tool all over the acetate, turning it as you move across your panel to create a random background.
Every one will be different, even if you use the same combination of inks.
Add a few drops of the Blending Solution to the felt, without adding any more of the coloured inks, and create a second piece of background. 
This will give you a much paler piece of background to work with.
Next comes the fun part, but it will only work with Archival Ink. 
Stamp your chosen image on to the acetate on the same side as you put the inks. 
Leave it to dry very briefly, and then wipe the ink away using a dry cloth, or paper towel. 
Any colour of Archival ink will work, and I actually like the the slightly grey shadow that is left by using the black ink. 
Keep stamping and wiping away the ink over the entire panel until it is randomly covered. You can also use a fine detailed stamp such as a greeting with this technique.
At the end of the day just play, what have you got to lose except a little bit of time, and maybe some acetate. 

Kim - Woodland GladeI managed to get this picture from the Hobby Art blog itself of the card from the TV.
The black images that appear on the panel above have been stamped on the uninked side of the acetate using Stazon Ink. I find that the image stamps out better on that side, but do remember that you will be turning the acetate over so if you have used a greeting stamp on your background panel it will then be in reverse. That is why I chose a very random text stamp as it can’t easily be read so works just as well in reverse.
I'm hoping to get some playtime this weekend as my parcel arrived today with all the new stamps for the next Hobby Art TV show at the end of the month. There are some real beauties so I can't wait. 
Have a great weekend. Hugs Kimx