Followers

Wednesday 31 August 2016

Happy Birthday Ammi, we miss you.

Evening Everyone,
Today my son Adam would have been 35, so it is a day that has been hard for me.
It is full of happy memories of course, but tinged with the sadness of not being able to celebrate with him in person.
I spent quite a time this afternoon sifting through old photos trying to find a couple to share with you tonight.
These were taken at the party that we threw him for his 18th birthday.
OMG the memories. How young his sisters looked, so many other little people now in their 20's and 30's, and who knew that I was ever that young and skinny lol. I'll spare you the reminded of that or there might be a mutiny.
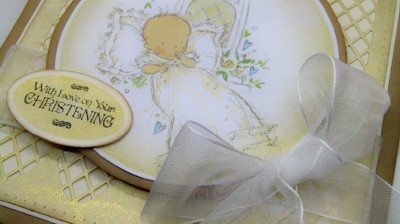
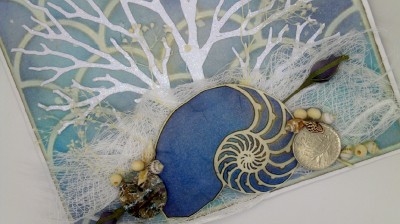
I also looked through my stash of cards trying to decide what to share with you to mark his special day and I came across these.
I would like to think that in an ideal world this is how he is spending the day, relaxing in the sunshine.
Of course perhaps he has taken up golf. I still have his Great Granddad's golf clubs in the loft looking a lot like these.
I've taken flowers to the church yard, and lit a candle, so now I will raise a glass (of grapefruit squash, I know how to party lol) in his memory before I get an early night.
Happy Birthday Ammi, always with us.
Hugs Kimx

Tuesday 30 August 2016

Happy 21st

Evening Everyone
I don't want to complain about the glorious weather that we have been having, but I have to say that it is slowly doing me in. Seriously I can't cope in this heat.
Anyway, I told you that this year was full of big celebrations, so here is another one.
My niece turned 21 at the weekend. My brother really didn't plan that one very well did he, one daughter 18, and the other 21, both in the same year, and actually in the same month lol.
The background was created using a lovely Dreamweaver stencil and some Picket Fence Distress Ink.
I added a piece of fine white organza ribbon
 and plenty of flowers die cut from assorted papers from my stash.
The sentiment is by Woodware and forms part of the FRS131 21 Birthday stamp set.
I just hope it isn't considered too pink and girly lol.
Happy crafting.
Hugs Kimx

Monday 29 August 2016

With Love on your Christening

Hi All
One of the advantages when the rest of the family go on their annual holiday is that I can spread my things out without having to clear up at the end of the day. The kitchen side has become a die cutting/embossing station!!
With that in mind I try to sort out one section of my craft room, which of course always takes longer than anticipated.
This year I decided that it was the turn of my dies (a scarily large amount of them it has to be said lol)
Of course one of the lovely things about all of this sorting out is that you are reacquainted with dies that you had completely forgotten that you had.
I used part of a fabulous Sue Wilson die set CED1615 Striplets Lattice Window to create the background for this Christening card.
The central image is a LOTV topper from my stash cut out using a circular die.
I added a little glossy accents to the church window,
 as well as a ribbon bow
and a sentiment, also by LOTV.
I hope that they had some beautiful sunshine for Austins' special day on Sunday and that it remains just as nice for Mum and Dads 3rd anniversary tomorrow.
Have a great evening.
Hugs Kimx

Sunday 28 August 2016

Big Birthdays

Hi All
Wow another week over and I've not found time to blog.
To be honest this really hot weather that we have been experiencing has not suited me at all.
I love that it has been bright, don't get me wrong, but it has been just too hot for me to function once I get home from the lovely air conditioning at work.
There have been times when even that hasn't felt like it was working!
This year is a bit of a milestone year for quite a few people that I know - 1st, 16th, 18th, 21st, 50th and even a few 60's including my own in a couple of months.
Here is a card made for a very special young lady who celebrated her 18th birthday a couple of months ago.
As her name is Hollie I added a few holly leaves and used a berry red colour as her nickname happens to be HollyBerry.
I do love the Large Words and Numbers stamps that Francoise has designed for Woodware.
They make brilliant statement pieces to build a card around, and of course if you paper piece them you get at least 2 for the price of 1. 
As luck would have it I didn't have long to wait to use the 2nd panel as my niece celebrated her 18th birthday earlier this month.
This time I used some zentangled flowers to embellish my paper pieced panel.. 
The leaves are die cut from a sheet of card brayered with Sparkle Medium.
The square background has been die cut using a couple of lovely Sue Wilson dies.
I had better get a move on and make the most of the cool snap that we seem to be experiencing today. The rain is too late to save the hanging baskets that I forgot to water while the family are on holiday, but at least it has cooled things down a little bit.
Have a great evening.
Hugs Kimx

Monday 22 August 2016

By or Under the Sea for CCM and WoodwareWitterings

Morning Everyone,
We have a new challenge over at CCM today, and as I am also on the DT for Woodware  who are our sponsors this time round I will be sharing first so you get a little bit of a head start.
Bec is hosting our By or Under the Sea challenge at CCM, so we want to see what you can come up with that is either an underwater scene or a coastal/beach scene. 
I wasn't sure what to make for this as I don't seem to own very much in the way of sea themed stamps, 
 however what I did find were several Dreamweaver Metal Stencils which worked every bit as well.
 A seahorse
and a rather nice tropical fish.
Of course the beauty of a stencil is that you can just turn it over, and hey presto your fish is swimming in the opposite direction lol.
If only you could do that with a stamp!
I also found that I had a rather nice fish scale stencil which I used to create the background.
The coral like structure is actually a tree die, also by Dreamweaver.
I added a strip of medical gauze along the bottom edge and sprinkled it with some Frantage Powders making sure to heat from underneath so as not to blow the powder everywhere. 
 Of course I had to play with my stencils before I came up with my finished design,
 so I made a second card with the leftovers.
 This card shows off the background stencil a little better.
 This time I used a Nautilus shell and some assorted ephemera from my stash.
This picture also gives you a better idea of how I used the stencils.
First I ran them through my embossing machine making sure to follow the suggested layering stack as recommended by Dreamweaver.
Next, keeping the stencil firmly in place I sponged the image with dye based inks and then used a fine black Micron pen to draw around the stencil to add in all the detail.
Finally I fussy cut the images and brushed them all with some gold gilding wax.
I hope that you will join us this week, both at CCM and WoodwareWitterings.
Have a marvellous Monday.
Happy Crafting and hugs
Kimx

Saturday 20 August 2016

You can never have too many Gems

Morning Everyone,
Where on earth are the days disappearing to? No sooner is it Monday than it's Friday again, and the only posts that seem to get done are the scheduled ones for Woodware.
I will get organised again sometime, I'm just not too sure that it will be any time soon lol.
This week we have been featuring cards with plenty of bling over at WoodwareWitterings in  the shape of Mark Richard products.
Now I find that Jane Gill's Bubble Bloom stamps are the perfect starting point for using plenty of gems, crystals, nailheads etc.
I have gone for a fairly dramatic colour scheme with red, white and black with a hint of silver.
I stamped and embossed the image onto a piece of white cardstock and then lightly sponged around the edge with black dye based ink.
I also used the black ink to paint the image before adding my assorted gems, nailheads, glitter domes and a little bit of glitter glue.
I stamped and embossed down the edge of the red panel and then painted the dots with undiluted thin bleach which has taken out some of the colour.
As usual I created a second, slightly different version of my card.
There are slightly less gems on this one and I also stamped and embossed the image using a Versamark inkpad and silver embossing powder.
I hope that you have enjoyed playing along with us this week and now have a stash of cards with an extra touch of bling.
Happy Crafting and hugs
Kimx

Thursday 18 August 2016

Weekend Workshop with Hobby Art Jenny Part 1

Afternoon Everyone,
I hope that you have had another great summer day.
I prepared this post nearly a fortnight ago, but you know me and technology we are not the best of friends. I lost all of the links to the Hobby Art website and it has taken ages to get them sorted out, so my apologies for not posting this before now.
I was lucky enough to be invited by Hobby Art Jenny to teach at the workshop at the beginning of the month. Good food, wonderful products to play with, and 32 enthusiastic ladies, what a great way to spend the day.
I taught two workshops in the morning to half of the group and then after a rather tasty lunch they swapped tables to work with Jenny while I taught the same two classes to the rest of the group.
It turned into a gloriously hot day and so of course I had typically chosen Autumn and Christmas themed cards lol.
The first workshop was about masking using the fabulous Falling Leaves stamp set and the Mask-it sheet from Woodware.
I just love leaves, I'm definitely an Autumn girlie.
I was very good and finished off all of the bits and pieces when I got home so there are several more samples to share with you than I had prepared for the ladies.
Of course there was shopping to be done throughout the day so a fabulous leafy die set fell into my basket.
I think that it had only just arrived, Becki was frantically pricing things, so I don't think that it has made it on to the website yet.
The second part of the masking class used a strip of masking tape across the middle of the card instead of fussy cut leaves.
This card used a double strip of tape and then some fussy cut and coloured leaves to embellish the edges.
I had such fun with this stamp set, and as you can see I have added several cards suitable for men to my card stash.
I think I will share the second class in a separate post so as not to overwhelm you with pictures.
Have a great evening.
Hugs Kimx